61 KiB
Enquirer
Stylish CLI prompts that are user-friendly, intuitive and easy to create.
>_ Prompts should be more like conversations than inquisitions▌
(Example shows Enquirer's Survey Prompt)
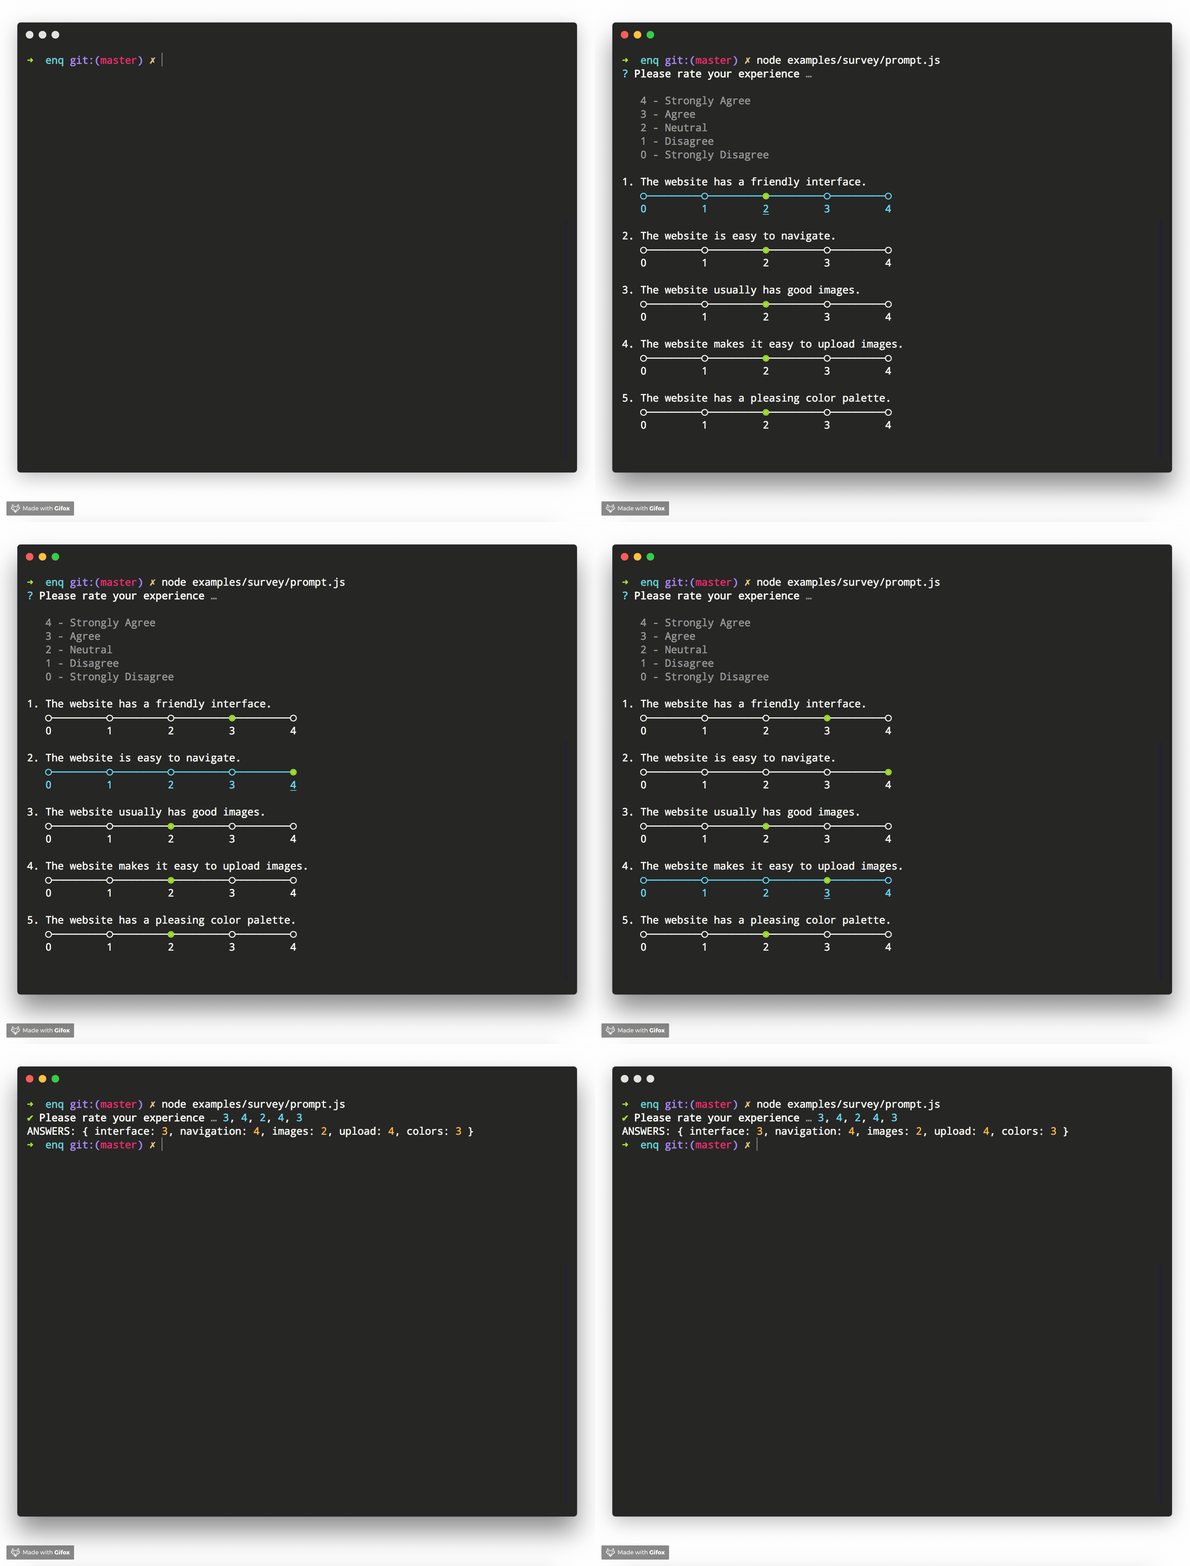
The terminal in all examples is Hyper, theme is hyper-monokai-extended.
See more prompt examples
Created by jonschlinkert and doowb, Enquirer is fast, easy to use, and lightweight enough for small projects, while also being powerful and customizable enough for the most advanced use cases.
- Fast - Loads in ~4ms (that's about 3-4 times faster than a single frame of a HD movie at 60fps)
- Lightweight - Only one dependency, the excellent ansi-colors by Brian Woodward.
- Easy to implement - Uses promises and async/await and sensible defaults to make prompts easy to create and implement.
- Easy to use - Thrill your users with a better experience! Navigating around input and choices is a breeze. You can even create quizzes, or record and playback key bindings to aid with tutorials and videos.
- Intuitive - Keypress combos are available to simplify usage.
- Flexible - All prompts can be used standalone or chained together.
- Stylish - Easily override semantic styles and symbols for any part of the prompt.
- Extensible - Easily create and use custom prompts by extending Enquirer's built-in prompts.
- Pluggable - Add advanced features to Enquirer using plugins.
- Validation - Optionally validate user input with any prompt.
- Well tested - All prompts are well-tested, and tests are easy to create without having to use brittle, hacky solutions to spy on prompts or "inject" values.
- Examples - There are numerous examples available to help you get started.
If you like Enquirer, please consider starring or tweeting about this project to show your support. Thanks!
>_ Ready to start making prompts your users will love? ▌
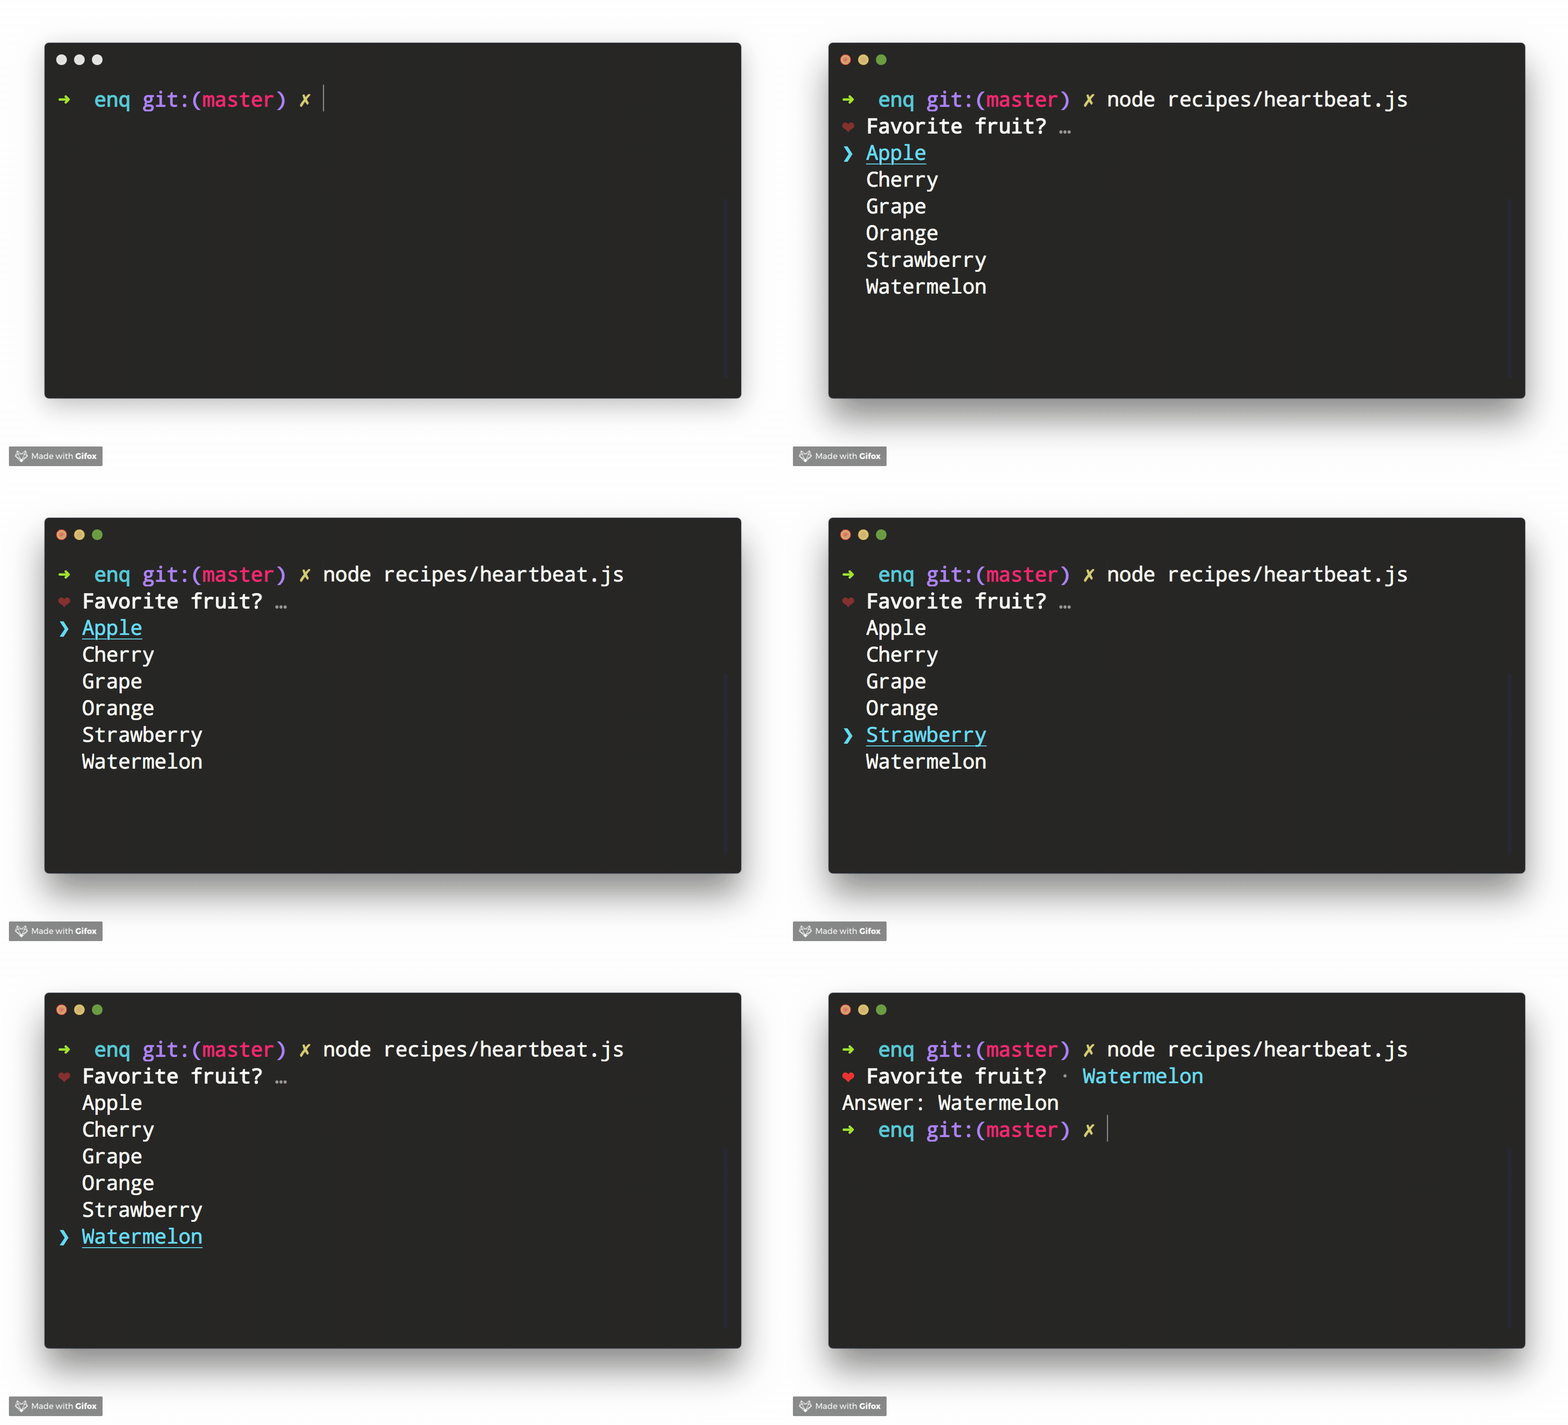
❯ Getting started
Get started with Enquirer, the most powerful and easy-to-use Node.js library for creating interactive CLI prompts.
❯ Install
Install with npm:
$ npm install enquirer --save
Install with yarn:
$ yarn add enquirer

(Requires Node.js 8.6 or higher. Please let us know if you need support for an earlier version by creating an issue.)
❯ Usage
Single prompt
The easiest way to get started with enquirer is to pass a question object to the prompt method.
const { prompt } = require('enquirer');

const response = await prompt({
  type: 'input',
  name: 'username',
  message: 'What is your username?'
});

console.log(response); // { username: 'jonschlinkert' }
(Examples with await need to be run inside an async function)
Multiple prompts
Pass an array of "question" objects to run a series of prompts.
const response = await prompt([
  {
    type: 'input',
    name: 'name',
    message: 'What is your name?'
  },
  {
    type: 'input',
    name: 'username',
    message: 'What is your username?'
  }
]);

console.log(response); // { name: 'Edward Chan', username: 'edwardmchan' }
Different ways to run enquirer
1. By importing the specific built-in prompt
const { Confirm } = require('enquirer');

const prompt = new Confirm({
  name: 'question',
  message: 'Did you like enquirer?'
});

prompt.run()
  .then(answer => console.log('Answer:', answer));
2. By passing the options to prompt
const { prompt } = require('enquirer');

prompt({
  type: 'confirm',
  name: 'question',
  message: 'Did you like enquirer?'
})
  .then(answer => console.log('Answer:', answer));
Jump to: Getting Started · Prompts · Options · Key Bindings
❯ Enquirer
Enquirer is a prompt runner
Add Enquirer to your JavaScript project with following line of code.
const Enquirer = require('enquirer');
The main export of this library is the Enquirer class, which has methods and features designed to simplify running prompts.
const { prompt } = require('enquirer');
const question = [
  {
    type: 'input',
    name: 'username',
    message: 'What is your username?'
  },
  {
    type: 'password',
    name: 'password',
    message: 'What is your password?'
  }
];

let answers = await prompt(question);
console.log(answers);
Prompts control how values are rendered and returned
Each individual prompt is a class with special features and functionality for rendering the types of values you want to show users in the terminal, and subsequently returning the types of values you need to use in your application.
How can I customize prompts?
Below in this guide you will find information about creating custom prompts. For now, we'll focus on how to customize an existing prompt.
All of the individual prompt classes in this library are exposed as static properties on Enquirer. This allows them to be used directly without using enquirer.prompt().
Use this approach if you need to modify a prompt instance, or listen for events on the prompt.
Example
const { Input } = require('enquirer');
const prompt = new Input({
  name: 'username',
  message: 'What is your username?'
});

prompt.run()
  .then(answer => console.log('Username:', answer))
  .catch(console.error);
Enquirer
Create an instance of Enquirer.
Params
options{Object}: (optional) Options to use with all prompts.answers{Object}: (optional) Answers object to initialize with.
Example
const Enquirer = require('enquirer');
const enquirer = new Enquirer();
register()
Register a custom prompt type.
Params
type{String}fn{Function|Prompt}:Promptclass, or a function that returns aPromptclass.returns{Object}: Returns the Enquirer instance
Example
const Enquirer = require('enquirer');
const enquirer = new Enquirer();
enquirer.register('customType', require('./custom-prompt'));
prompt()
Prompt function that takes a "question" object or array of question objects, and returns an object with responses from the user.
Params
questions{Array|Object}: Options objects for one or more prompts to run.returns{Promise}: Promise that returns an "answers" object with the user's responses.
Example
const Enquirer = require('enquirer');
const enquirer = new Enquirer();

const response = await enquirer.prompt({
  type: 'input',
  name: 'username',
  message: 'What is your username?'
});
console.log(response);
use()
Use an enquirer plugin.
Params
plugin{Function}: Plugin function that takes an instance of Enquirer.returns{Object}: Returns the Enquirer instance.
Example
const Enquirer = require('enquirer');
const enquirer = new Enquirer();
const plugin = enquirer => {
  // do stuff to enquire instance
};
enquirer.use(plugin);
Enquirer#prompt
Prompt function that takes a "question" object or array of question objects, and returns an object with responses from the user.
Params
questions{Array|Object}: Options objects for one or more prompts to run.returns{Promise}: Promise that returns an "answers" object with the user's responses.
Example
const { prompt } = require('enquirer');
const response = await prompt({
  type: 'input',
  name: 'username',
  message: 'What is your username?'
});
console.log(response);
❯ Prompts
This section is about Enquirer's prompts: what they look like, how they work, how to run them, available options, and how to customize the prompts or create your own prompt concept.
Getting started with Enquirer's prompts
- Prompt - The base
Promptclass used by other prompts - Built-in prompts
- Prompt Types - The base
Promptclass used by other prompts - Custom prompts - Enquirer 2.0 introduced the concept of prompt "types", with the goal of making custom prompts easier than ever to create and use.
Prompt
The base Prompt class is used to create all other prompts.
const { Prompt } = require('enquirer');
class MyCustomPrompt extends Prompt {}
See the documentation for creating custom prompts to learn more about how this works.
Prompt Options
Each prompt takes an options object (aka "question" object), that implements the following interface:
{
  // required
  type: string | function,
  name: string | function,
  message: string | function | async function,

  // optional
  skip: boolean | function | async function,
  initial: string | function | async function,
  format: function | async function,
  result: function | async function,
  validate: function | async function,
}
Each property of the options object is described below:
| Property | Required? | Type | Description |
|---|---|---|---|
type |
yes | string\|function |
Enquirer uses this value to determine the type of prompt to run, but it's optional when prompts are run directly. |
name |
yes | string\|function |
Used as the key for the answer on the returned values (answers) object. |
message |
yes | string\|function |
The message to display when the prompt is rendered in the terminal. |
skip |
no | boolean\|function |
If true it will not ask that prompt. |
initial |
no | string\|function |
The default value to return if the user does not supply a value. |
format |
no | function |
Function to format user input in the terminal. |
result |
no | function |
Function to format the final submitted value before it's returned. |
validate |
no | function |
Function to validate the submitted value before it's returned. This function may return a boolean or a string. If a string is returned it will be used as the validation error message. |
Example usage
const { prompt } = require('enquirer');

const question = {
  type: 'input',
  name: 'username',
  message: 'What is your username?'
};

prompt(question)
  .then(answer => console.log('Answer:', answer))
  .catch(console.error);
Built-in prompts
- AutoComplete Prompt
- BasicAuth Prompt
- Confirm Prompt
- Form Prompt
- Input Prompt
- Invisible Prompt
- List Prompt
- MultiSelect Prompt
- Numeral Prompt
- Password Prompt
- Quiz Prompt
- Survey Prompt
- Scale Prompt
- Select Prompt
- Sort Prompt
- Snippet Prompt
- Toggle Prompt
AutoComplete Prompt
Prompt that auto-completes as the user types, and returns the selected value as a string.
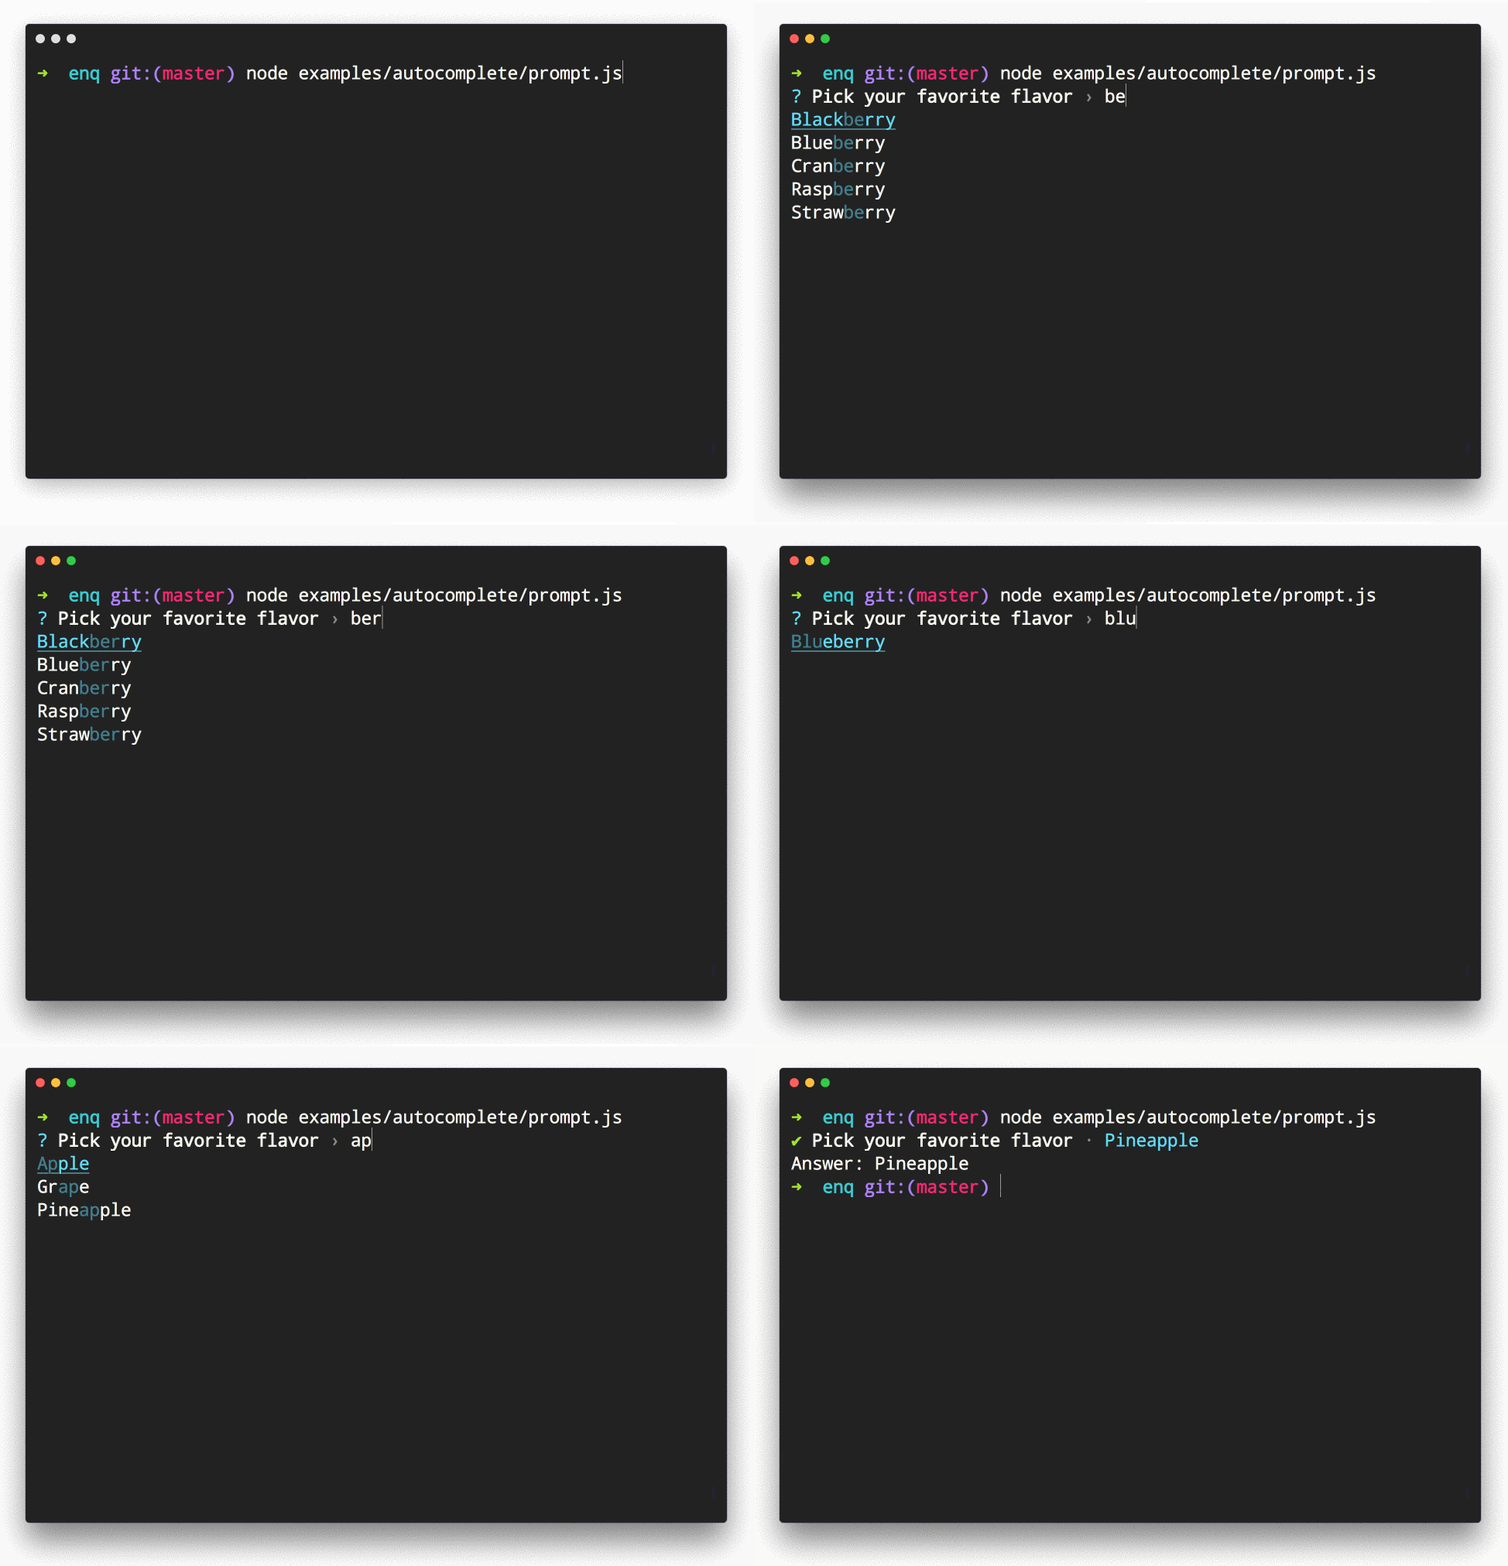
Example Usage
const { AutoComplete } = require('enquirer');

const prompt = new AutoComplete({
  name: 'flavor',
  message: 'Pick your favorite flavor',
  limit: 10,
  initial: 2,
  choices: [
    'Almond',
    'Apple',
    'Banana',
    'Blackberry',
    'Blueberry',
    'Cherry',
    'Chocolate',
    'Cinnamon',
    'Coconut',
    'Cranberry',
    'Grape',
    'Nougat',
    'Orange',
    'Pear',
    'Pineapple',
    'Raspberry',
    'Strawberry',
    'Vanilla',
    'Watermelon',
    'Wintergreen'
  ]
});

prompt.run()
  .then(answer => console.log('Answer:', answer))
  .catch(console.error);
AutoComplete Options
| Option | Type | Default | Description |
|---|---|---|---|
highlight |
function |
dim version of primary style |
The color to use when "highlighting" characters in the list that match user input. |
multiple |
boolean |
false |
Allow multiple choices to be selected. |
suggest |
function |
Greedy match, returns true if choice message contains input string. | Function that filters choices. Takes user input and a choices array, and returns a list of matching choices. |
initial |
number |
0 | Preselected item in the list of choices. |
footer |
function |
None | Function that displays footer text |
Related prompts
↑ back to: Getting Started · Prompts
BasicAuth Prompt
Prompt that asks for username and password to authenticate the user. The default implementation of authenticate function in BasicAuth prompt is to compare the username and password with the values supplied while running the prompt. The implementer is expected to override the authenticate function with a custom logic such as making an API request to a server to authenticate the username and password entered and expect a token back.

Example Usage
const { BasicAuth } = require('enquirer');

 const prompt = new BasicAuth({
  name: 'password',
  message: 'Please enter your password',
  username: 'rajat-sr',
  password: '123',
  showPassword: true
});

 prompt
  .run()
  .then(answer => console.log('Answer:', answer))
  .catch(console.error);
↑ back to: Getting Started · Prompts
Confirm Prompt
Prompt that returns true or false.
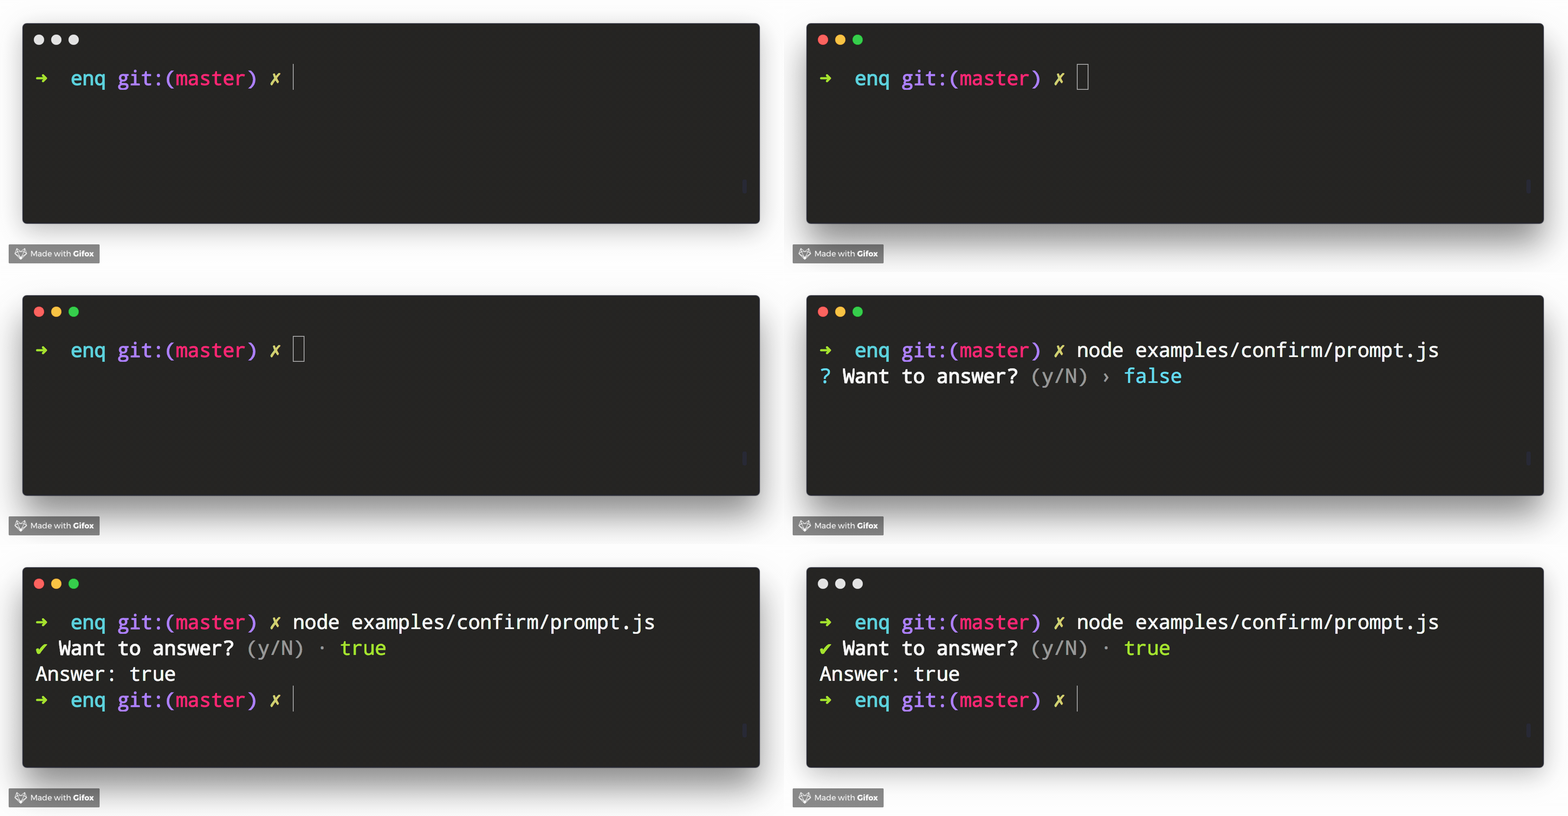
Example Usage
const { Confirm } = require('enquirer');

const prompt = new Confirm({
  name: 'question',
  message: 'Want to answer?'
});

prompt.run()
  .then(answer => console.log('Answer:', answer))
  .catch(console.error);
Related prompts
↑ back to: Getting Started · Prompts
Form Prompt
Prompt that allows the user to enter and submit multiple values on a single terminal screen.
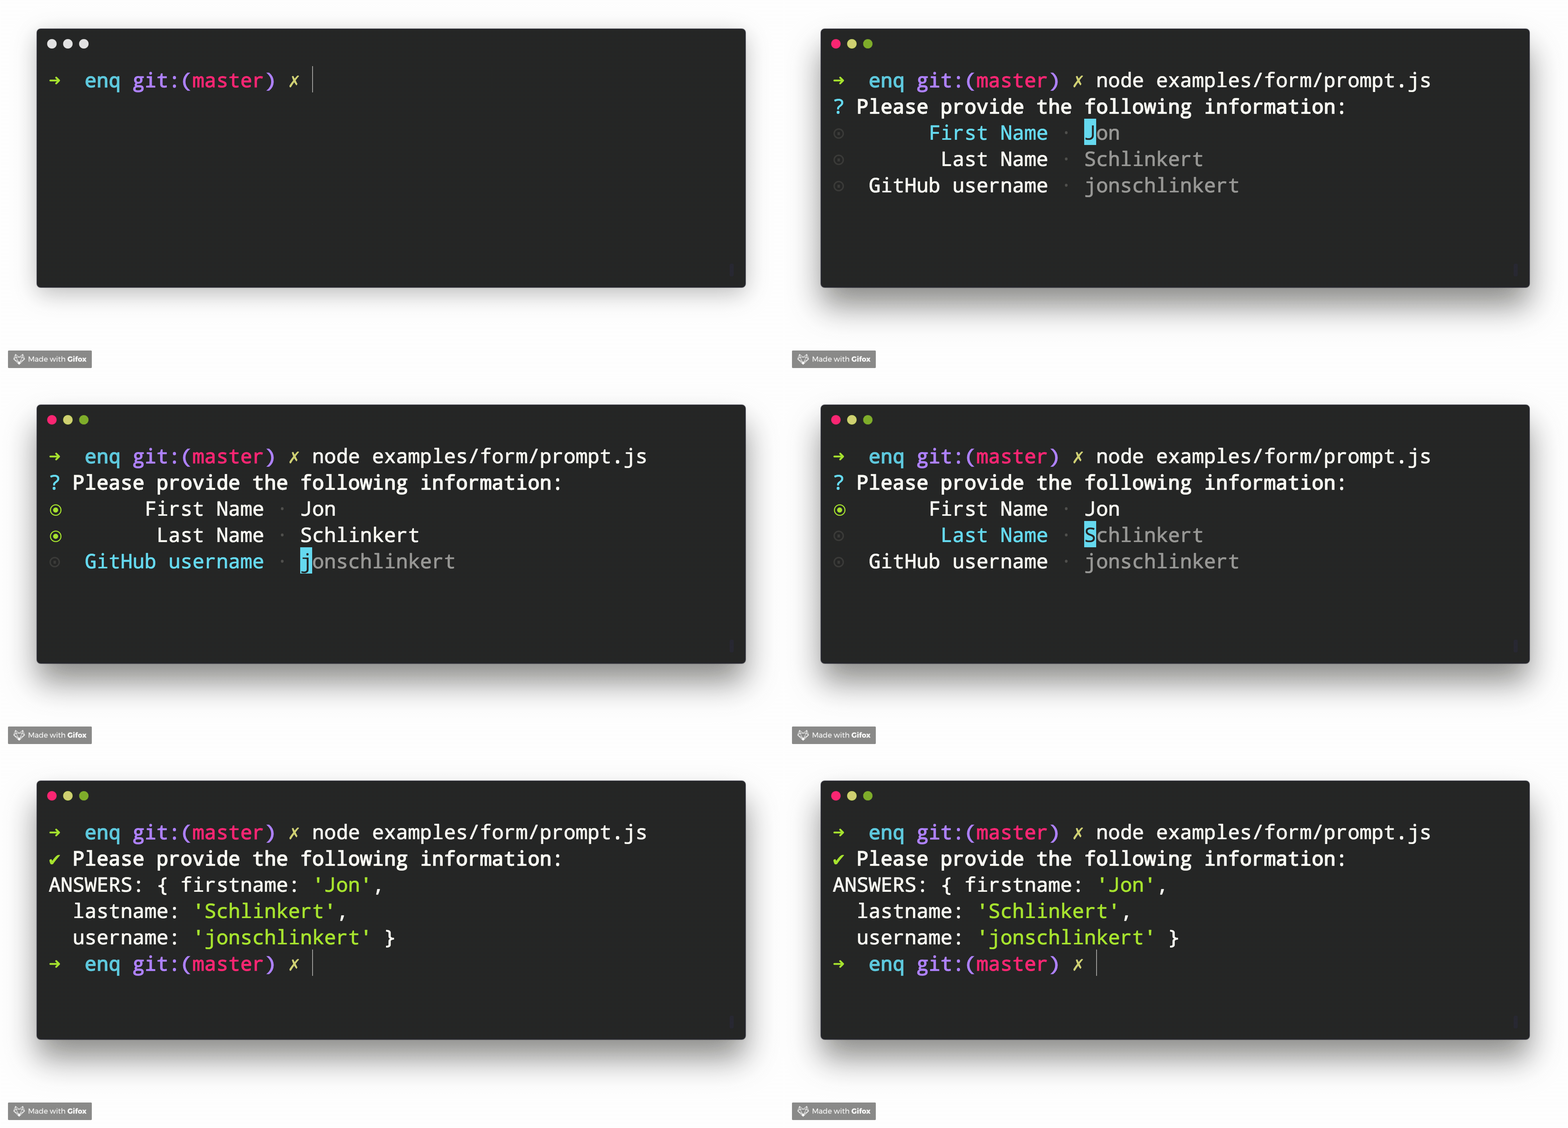
Example Usage
const { Form } = require('enquirer');

const prompt = new Form({
  name: 'user',
  message: 'Please provide the following information:',
  choices: [
    { name: 'firstname', message: 'First Name', initial: 'Jon' },
    { name: 'lastname', message: 'Last Name', initial: 'Schlinkert' },
    { name: 'username', message: 'GitHub username', initial: 'jonschlinkert' }
  ]
});

prompt.run()
  .then(value => console.log('Answer:', value))
  .catch(console.error);
Related prompts
↑ back to: Getting Started · Prompts
Input Prompt
Prompt that takes user input and returns a string.
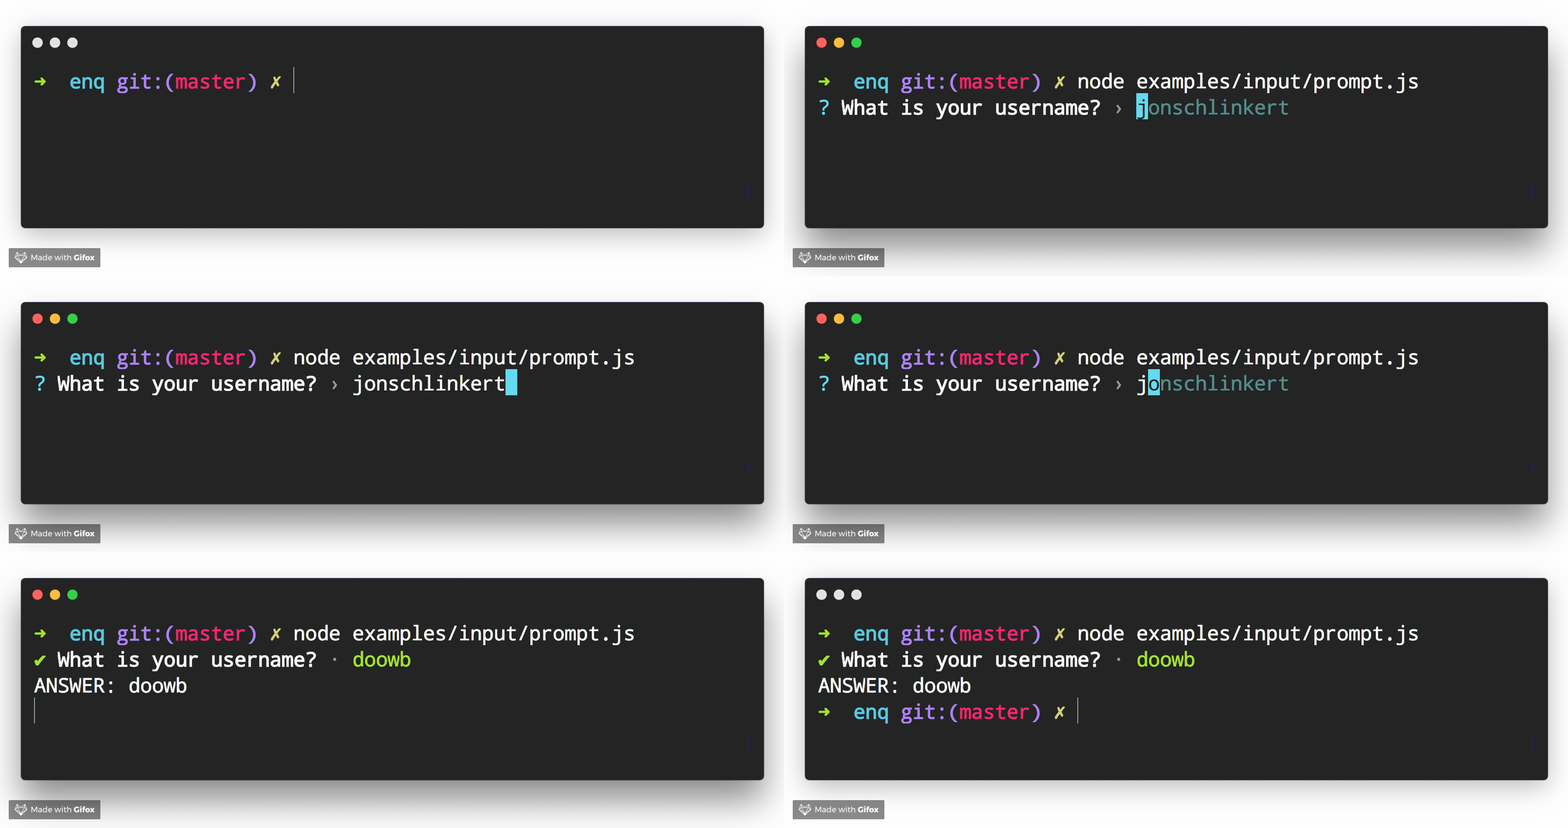
Example Usage
const { Input } = require('enquirer');
const prompt = new Input({
  message: 'What is your username?',
  initial: 'jonschlinkert'
});

prompt.run()
  .then(answer => console.log('Answer:', answer))
  .catch(console.log);
You can use data-store to store input history that the user can cycle through (see source).
Related prompts
↑ back to: Getting Started · Prompts
Invisible Prompt
Prompt that takes user input, hides it from the terminal, and returns a string.
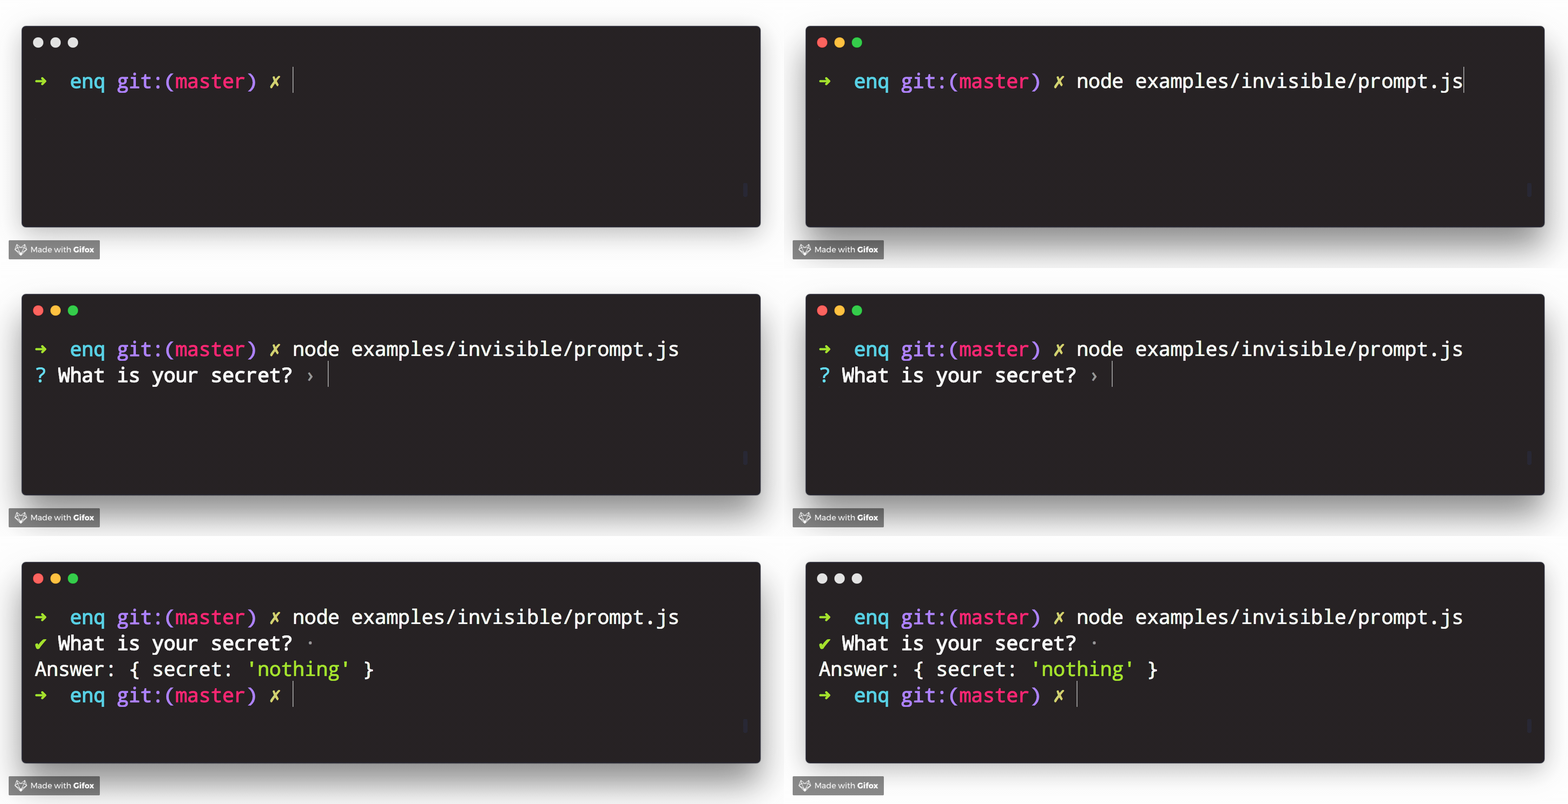
Example Usage
const { Invisible } = require('enquirer');
const prompt = new Invisible({
  name: 'secret',
  message: 'What is your secret?'
});

prompt.run()
  .then(answer => console.log('Answer:', { secret: answer }))
  .catch(console.error);
Related prompts
↑ back to: Getting Started · Prompts
List Prompt
Prompt that returns a list of values, created by splitting the user input. The default split character is , with optional trailing whitespace.
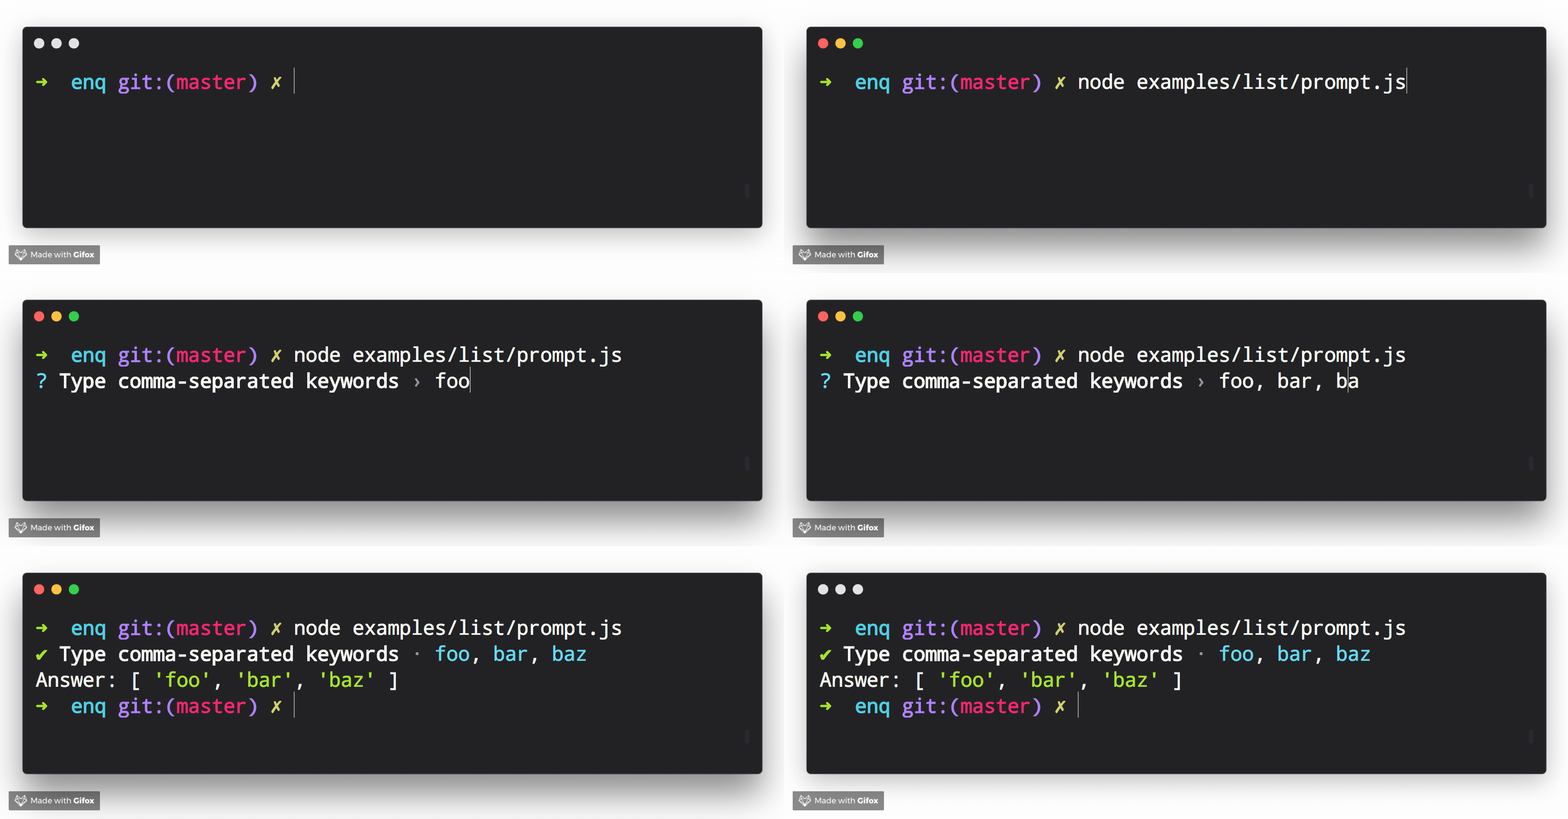
Example Usage
const { List } = require('enquirer');
const prompt = new List({
  name: 'keywords',
  message: 'Type comma-separated keywords'
});

prompt.run()
  .then(answer => console.log('Answer:', answer))
  .catch(console.error);
Related prompts
↑ back to: Getting Started · Prompts
MultiSelect Prompt
Prompt that allows the user to select multiple items from a list of options.

Example Usage
const { MultiSelect } = require('enquirer');

const prompt = new MultiSelect({
  name: 'value',
  message: 'Pick your favorite colors',
  limit: 7,
  choices: [
    { name: 'aqua', value: '#00ffff' },
    { name: 'black', value: '#000000' },
    { name: 'blue', value: '#0000ff' },
    { name: 'fuchsia', value: '#ff00ff' },
    { name: 'gray', value: '#808080' },
    { name: 'green', value: '#008000' },
    { name: 'lime', value: '#00ff00' },
    { name: 'maroon', value: '#800000' },
    { name: 'navy', value: '#000080' },
    { name: 'olive', value: '#808000' },
    { name: 'purple', value: '#800080' },
    { name: 'red', value: '#ff0000' },
    { name: 'silver', value: '#c0c0c0' },
    { name: 'teal', value: '#008080' },
    { name: 'white', value: '#ffffff' },
    { name: 'yellow', value: '#ffff00' }
  ]
});

prompt.run()
  .then(answer => console.log('Answer:', answer))
  .catch(console.error);

// Answer: ['aqua', 'blue', 'fuchsia']
Example key-value pairs
Optionally, pass a result function and use the .map method to return an object of key-value pairs of the selected names and values: example
const { MultiSelect } = require('enquirer');

const prompt = new MultiSelect({
  name: 'value',
  message: 'Pick your favorite colors',
  limit: 7,
  choices: [
    { name: 'aqua', value: '#00ffff' },
    { name: 'black', value: '#000000' },
    { name: 'blue', value: '#0000ff' },
    { name: 'fuchsia', value: '#ff00ff' },
    { name: 'gray', value: '#808080' },
    { name: 'green', value: '#008000' },
    { name: 'lime', value: '#00ff00' },
    { name: 'maroon', value: '#800000' },
    { name: 'navy', value: '#000080' },
    { name: 'olive', value: '#808000' },
    { name: 'purple', value: '#800080' },
    { name: 'red', value: '#ff0000' },
    { name: 'silver', value: '#c0c0c0' },
    { name: 'teal', value: '#008080' },
    { name: 'white', value: '#ffffff' },
    { name: 'yellow', value: '#ffff00' }
  ],
  result(names) {
   return this.map(names);
  }
});

prompt.run()
  .then(answer => console.log('Answer:', answer))
  .catch(console.error);

// Answer: { aqua: '#00ffff', blue: '#0000ff', fuchsia: '#ff00ff' }
Related prompts
↑ back to: Getting Started · Prompts
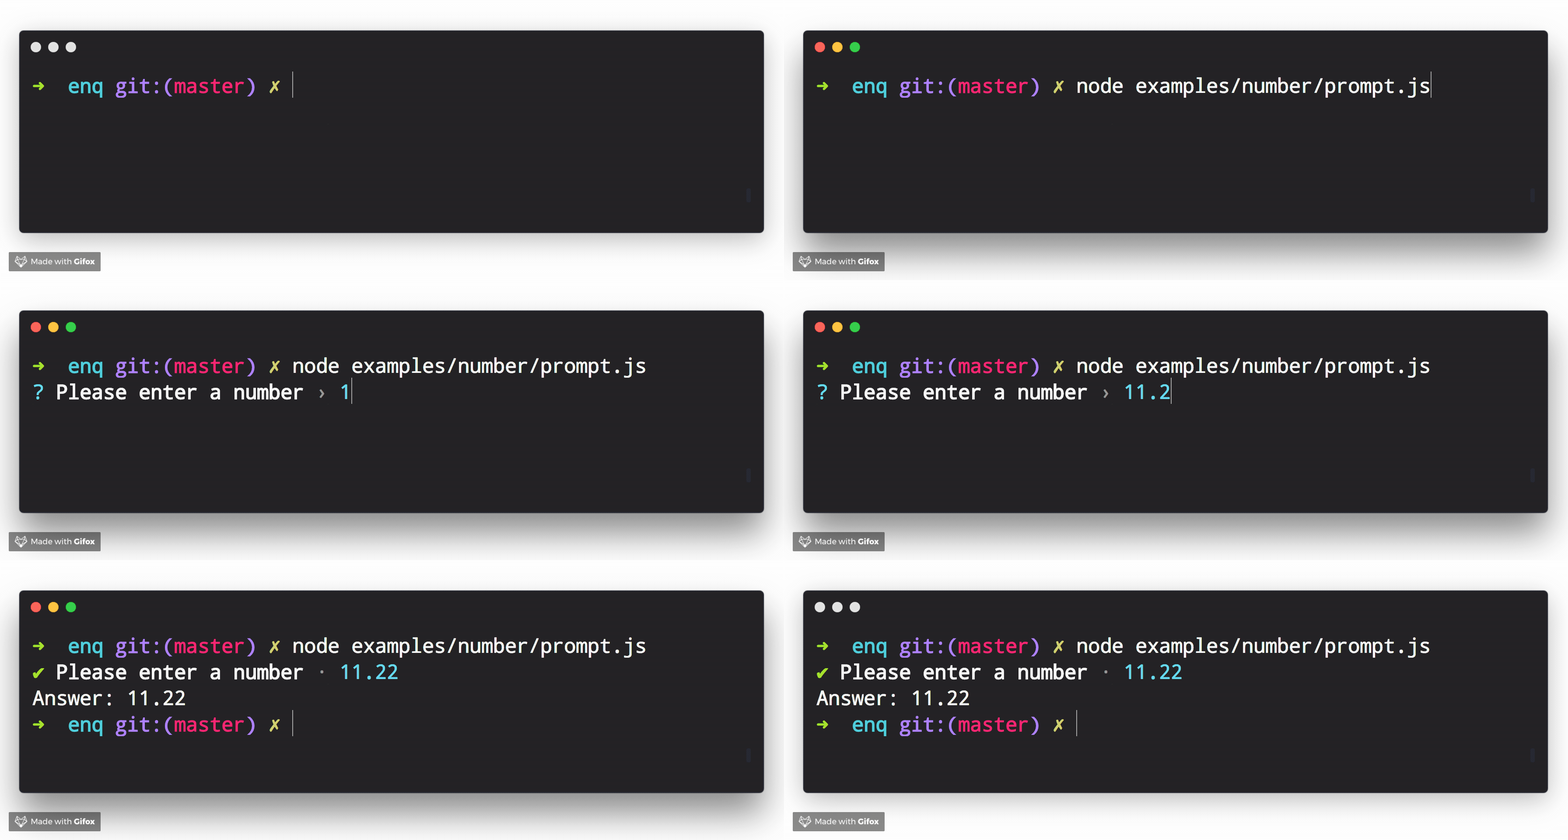
Numeral Prompt
Prompt that takes a number as input.
Example Usage
const { NumberPrompt } = require('enquirer');

const prompt = new NumberPrompt({
  name: 'number',
  message: 'Please enter a number'
});

prompt.run()
  .then(answer => console.log('Answer:', answer))
  .catch(console.error);
Related prompts
↑ back to: Getting Started · Prompts
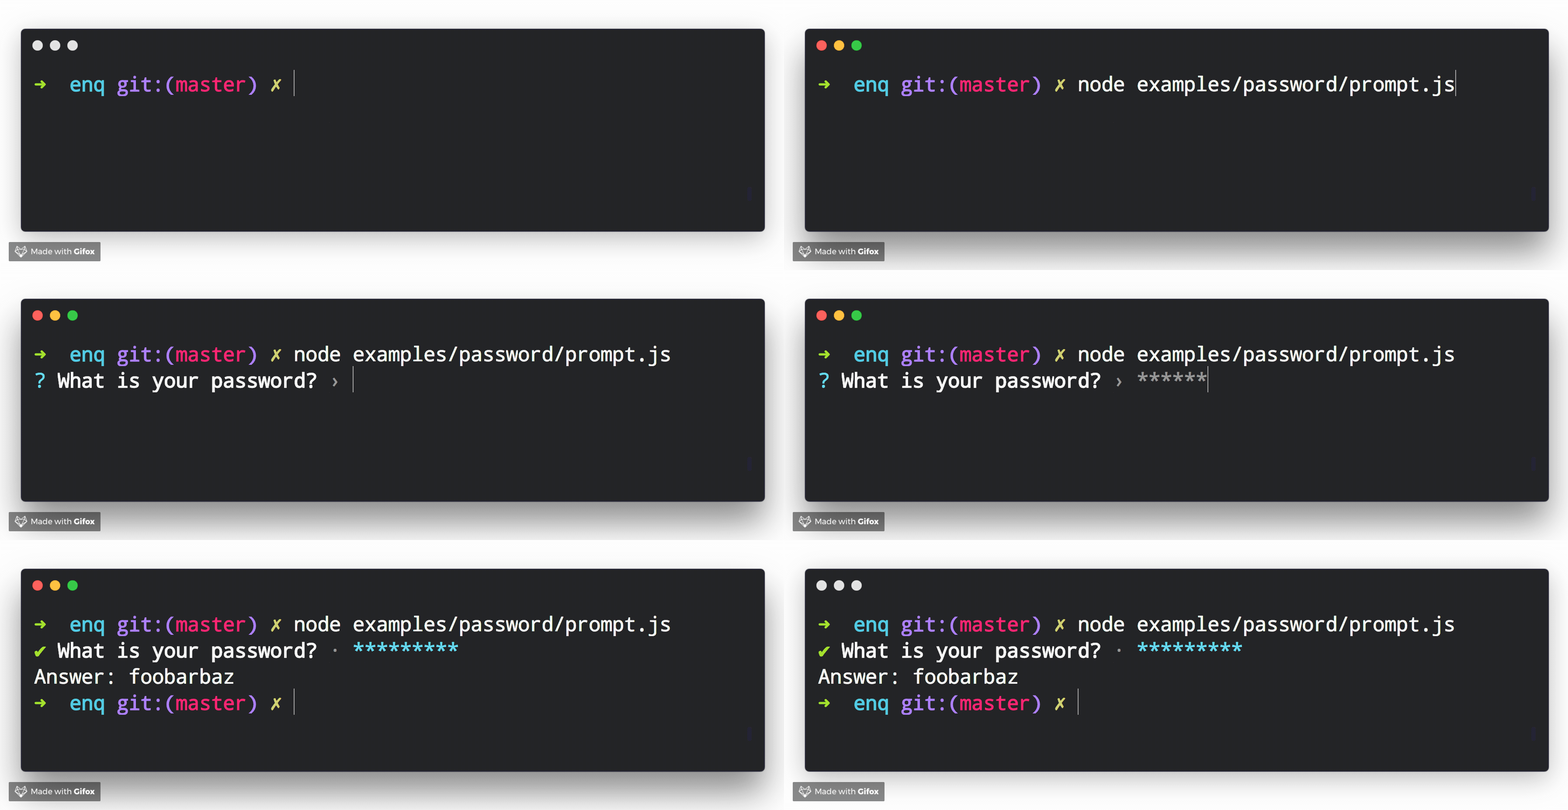
Password Prompt
Prompt that takes user input and masks it in the terminal. Also see the invisible prompt
Example Usage
const { Password } = require('enquirer');

const prompt = new Password({
  name: 'password',
  message: 'What is your password?'
});

prompt.run()
  .then(answer => console.log('Answer:', answer))
  .catch(console.error);
Related prompts
↑ back to: Getting Started · Prompts
Quiz Prompt
Prompt that allows the user to play multiple-choice quiz questions.

Example Usage
const { Quiz } = require('enquirer');

 const prompt = new Quiz({
  name: 'countries',
  message: 'How many countries are there in the world?',
  choices: ['165', '175', '185', '195', '205'],
  correctChoice: 3
});

 prompt
  .run()
  .then(answer => {
    if (answer.correct) {
      console.log('Correct!');
    } else {
      console.log(`Wrong! Correct answer is ${answer.correctAnswer}`);
    }
  })
  .catch(console.error);
Quiz Options
| Option | Type | Required | Description |
|---|---|---|---|
choices |
array |
Yes | The list of possible answers to the quiz question. |
correctChoice |
number |
Yes | Index of the correct choice from the choices array. |
↑ back to: Getting Started · Prompts
Survey Prompt
Prompt that allows the user to provide feedback for a list of questions.

Example Usage
const { Survey } = require('enquirer');

const prompt = new Survey({
  name: 'experience',
  message: 'Please rate your experience',
   scale: [
    { name: '1', message: 'Strongly Disagree' },
    { name: '2', message: 'Disagree' },
    { name: '3', message: 'Neutral' },
    { name: '4', message: 'Agree' },
    { name: '5', message: 'Strongly Agree' }
  ],
  margin: [0, 0, 2, 1],
  choices: [
    {
      name: 'interface',
      message: 'The website has a friendly interface.'
    },
    {
      name: 'navigation',
      message: 'The website is easy to navigate.'
    },
    {
      name: 'images',
      message: 'The website usually has good images.'
    },
    {
      name: 'upload',
      message: 'The website makes it easy to upload images.'
    },
    {
      name: 'colors',
      message: 'The website has a pleasing color palette.'
    }
  ]
});

prompt.run()
  .then(value => console.log('ANSWERS:', value))
  .catch(console.error);
Related prompts
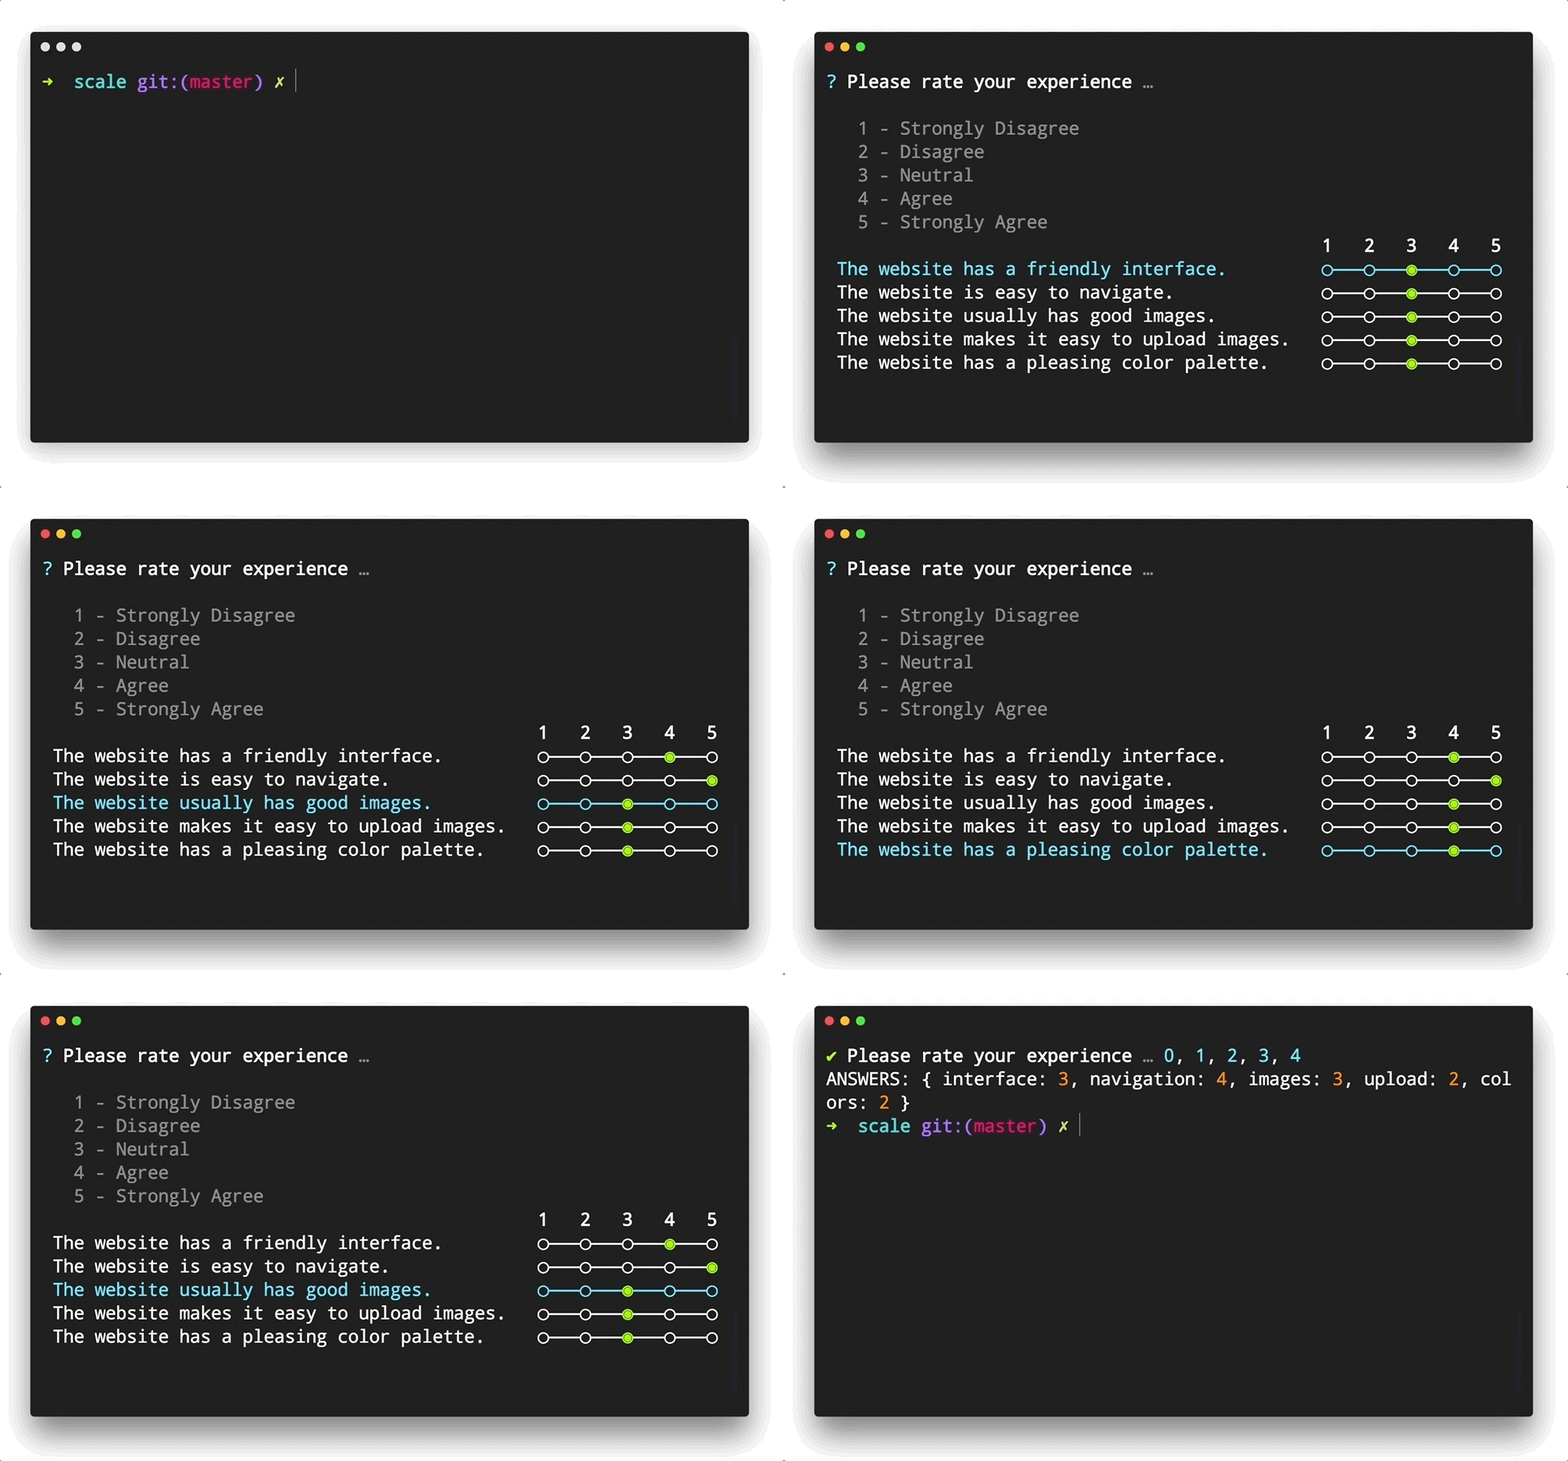
Scale Prompt
A more compact version of the Survey prompt, the Scale prompt allows the user to quickly provide feedback using a Likert Scale.
Example Usage
const { Scale } = require('enquirer');
const prompt = new Scale({
  name: 'experience',
  message: 'Please rate your experience',
  scale: [
    { name: '1', message: 'Strongly Disagree' },
    { name: '2', message: 'Disagree' },
    { name: '3', message: 'Neutral' },
    { name: '4', message: 'Agree' },
    { name: '5', message: 'Strongly Agree' }
  ],
  margin: [0, 0, 2, 1],
  choices: [
    {
      name: 'interface',
      message: 'The website has a friendly interface.',
      initial: 2
    },
    {
      name: 'navigation',
      message: 'The website is easy to navigate.',
      initial: 2
    },
    {
      name: 'images',
      message: 'The website usually has good images.',
      initial: 2
    },
    {
      name: 'upload',
      message: 'The website makes it easy to upload images.',
      initial: 2
    },
    {
      name: 'colors',
      message: 'The website has a pleasing color palette.',
      initial: 2
    }
  ]
});

prompt.run()
  .then(value => console.log('ANSWERS:', value))
  .catch(console.error);
Related prompts
↑ back to: Getting Started · Prompts
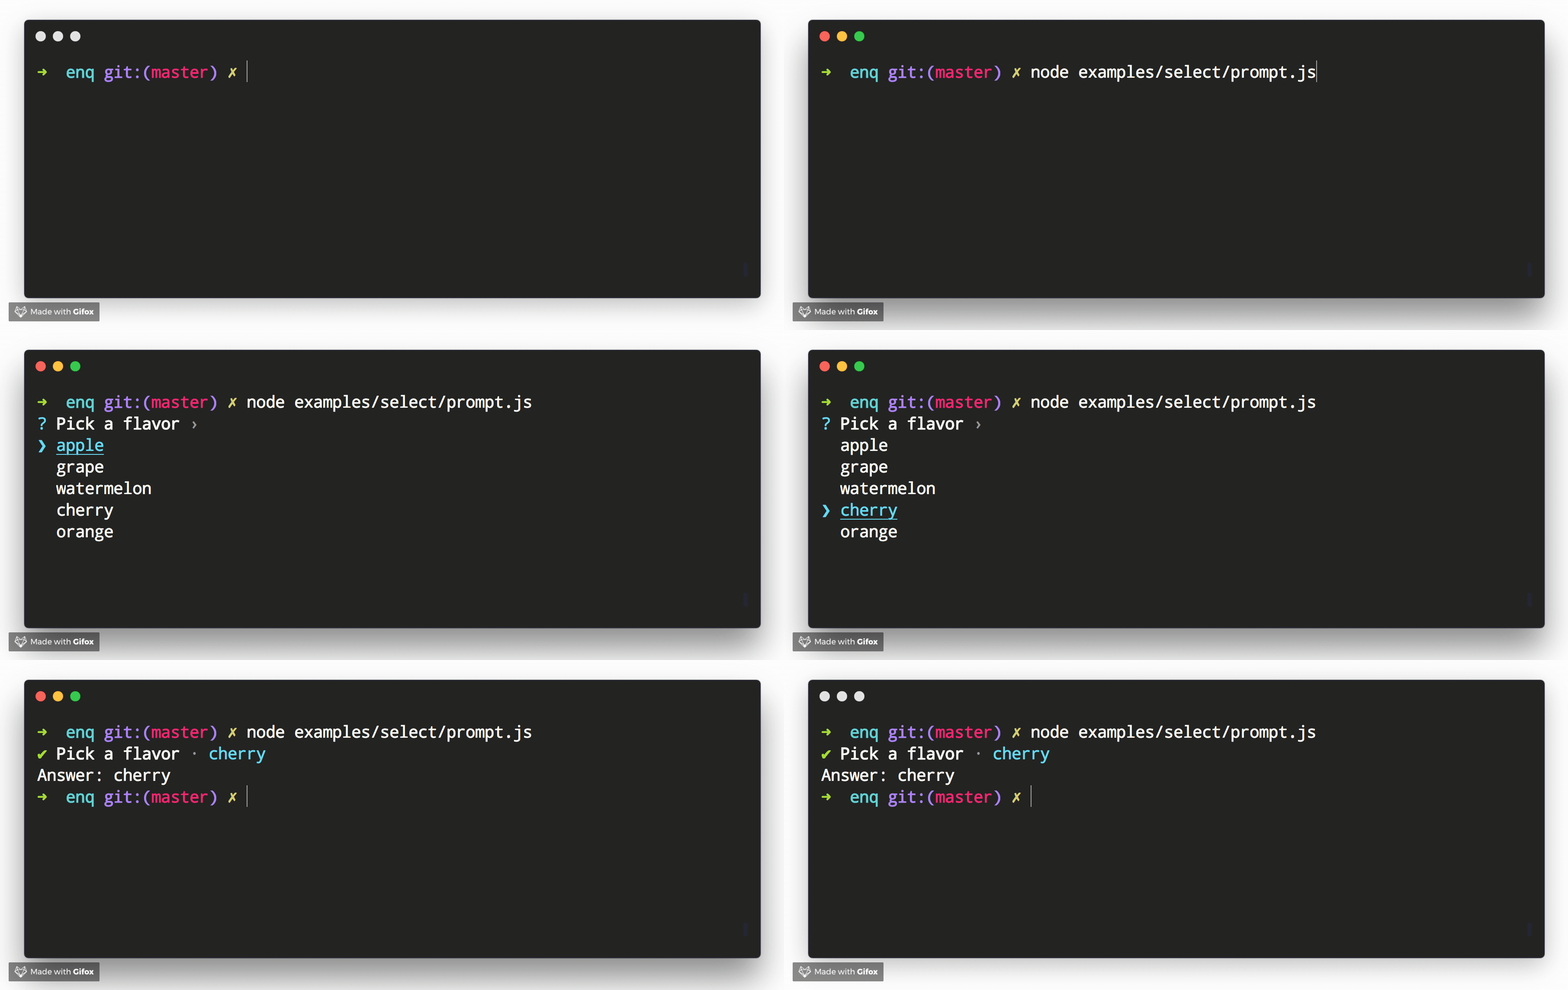
Select Prompt
Prompt that allows the user to select from a list of options.
Example Usage
const { Select } = require('enquirer');

const prompt = new Select({
  name: 'color',
  message: 'Pick a flavor',
  choices: ['apple', 'grape', 'watermelon', 'cherry', 'orange']
});

prompt.run()
  .then(answer => console.log('Answer:', answer))
  .catch(console.error);
Related prompts
↑ back to: Getting Started · Prompts
Sort Prompt
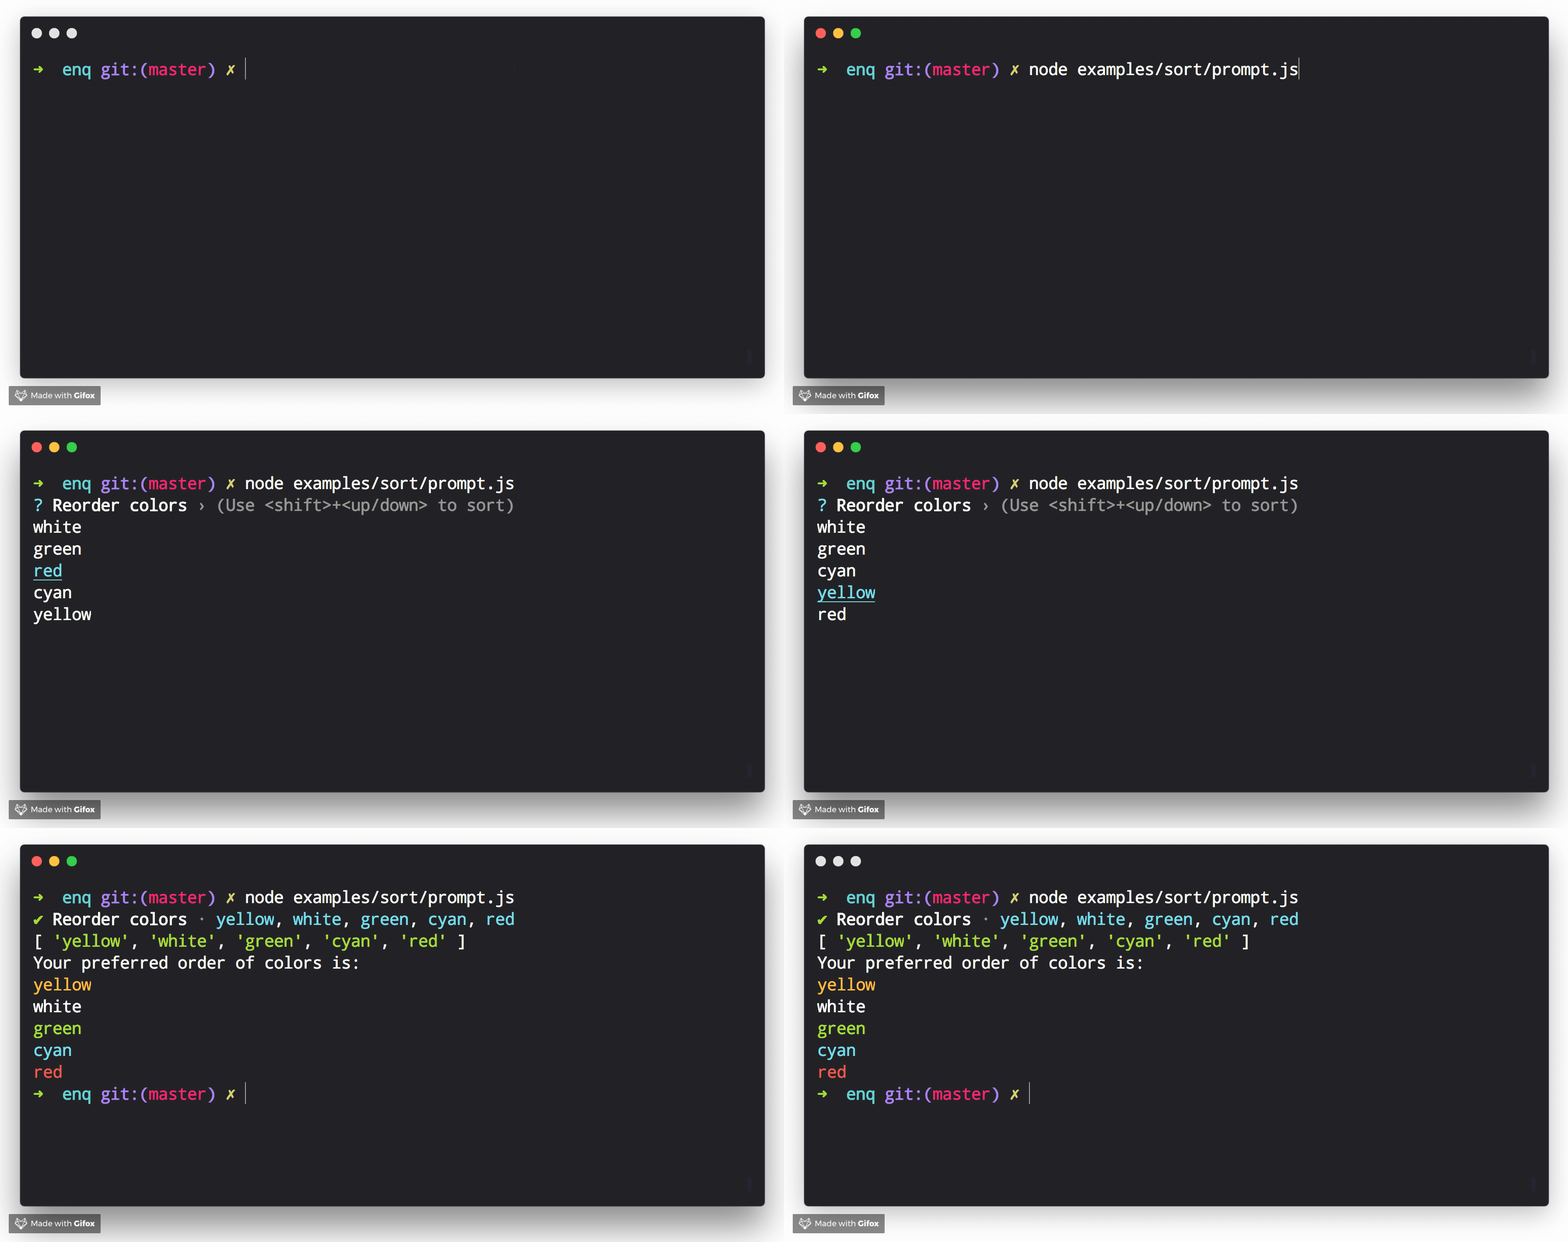
Prompt that allows the user to sort items in a list.
Example
In this example, custom styling is applied to the returned values to make it easier to see what's happening.
Example Usage
const colors = require('ansi-colors');
const { Sort } = require('enquirer');
const prompt = new Sort({
  name: 'colors',
  message: 'Sort the colors in order of preference',
  hint: 'Top is best, bottom is worst',
  numbered: true,
  choices: ['red', 'white', 'green', 'cyan', 'yellow'].map(n => ({
    name: n,
    message: colors[n](n)
  }))
});

prompt.run()
  .then(function(answer = []) {
    console.log(answer);
    console.log('Your preferred order of colors is:');
    console.log(answer.map(key => colors[key](key)).join('\n'));
  })
  .catch(console.error);
Related prompts
↑ back to: Getting Started · Prompts
Snippet Prompt
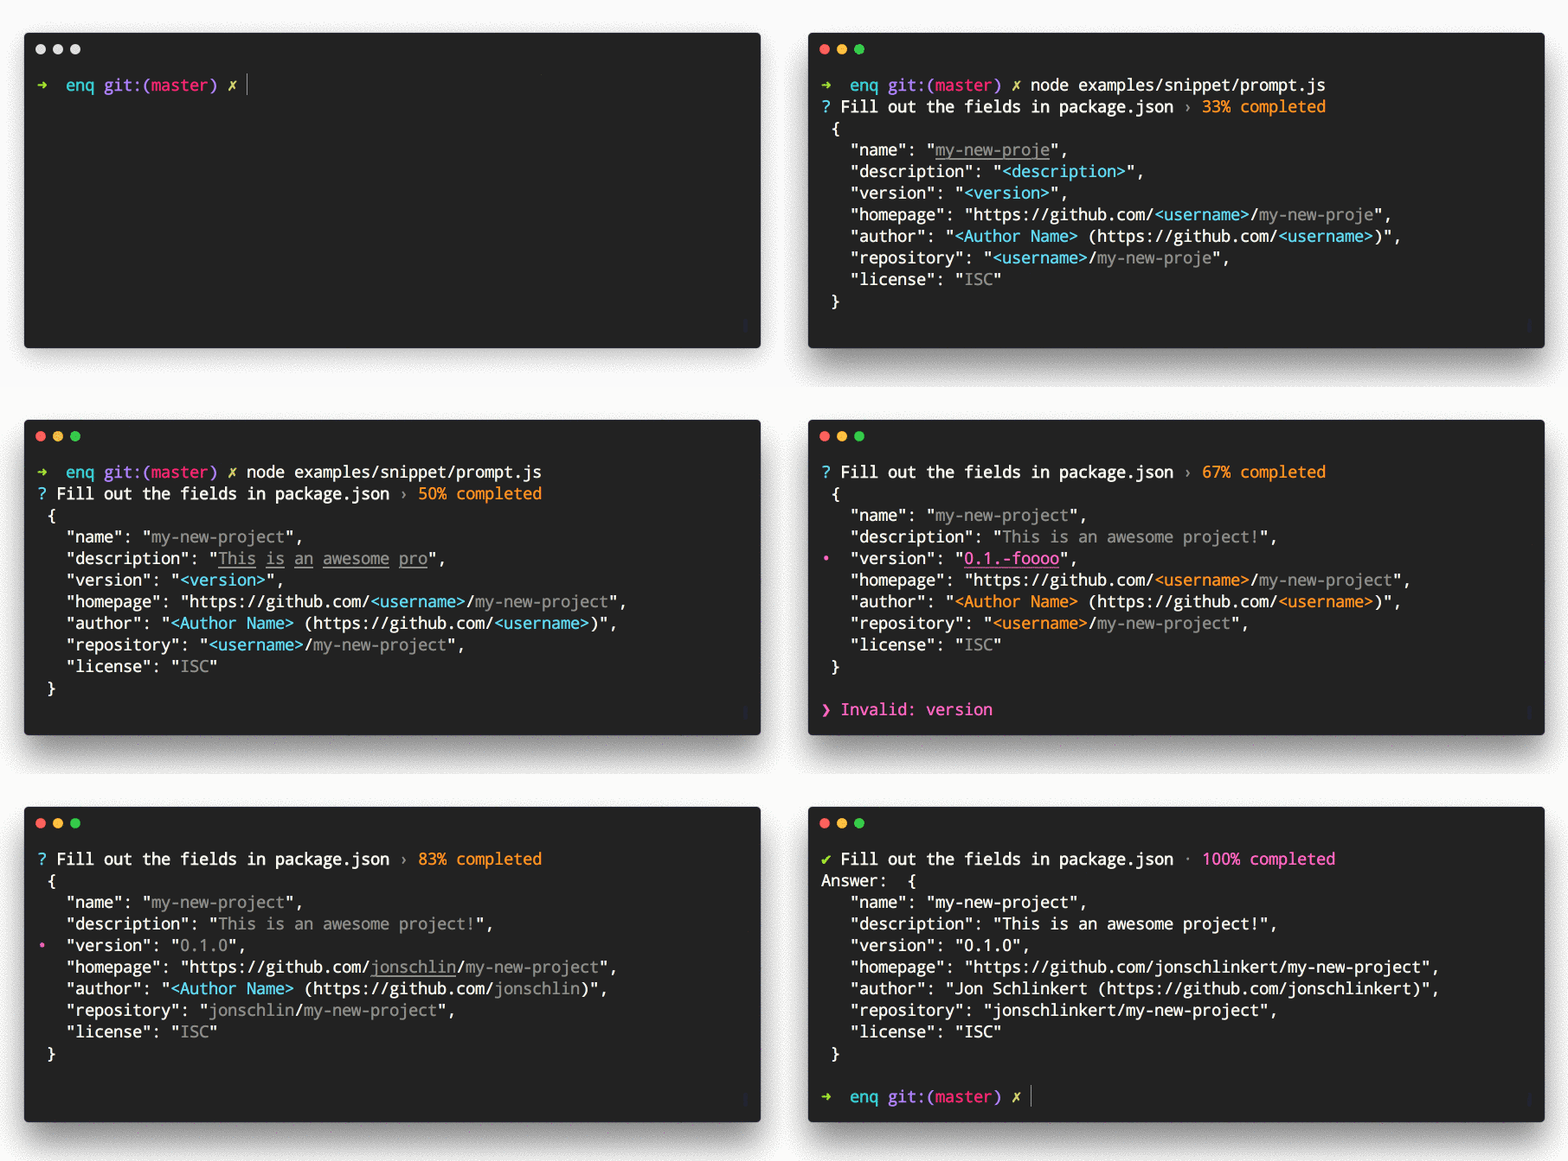
Prompt that allows the user to replace placeholders in a snippet of code or text.
Example Usage
const semver = require('semver');
const { Snippet } = require('enquirer');
const prompt = new Snippet({
  name: 'username',
  message: 'Fill out the fields in package.json',
  required: true,
  fields: [
    {
      name: 'author_name',
      message: 'Author Name'
    },
    {
      name: 'version',
      validate(value, state, item, index) {
        if (item && item.name === 'version' && !semver.valid(value)) {
          return prompt.styles.danger('version should be a valid semver value');
        }
        return true;
      }
    }
  ],
  template: `{
  "name": "\${name}",
  "description": "\${description}",
  "version": "\${version}",
  "homepage": "https://github.com/\${username}/\${name}",
  "author": "\${author_name} (https://github.com/\${username})",
  "repository": "\${username}/\${name}",
  "license": "\${license:ISC}"
}
`
});

prompt.run()
  .then(answer => console.log('Answer:', answer.result))
  .catch(console.error);
Related prompts
↑ back to: Getting Started · Prompts
Toggle Prompt
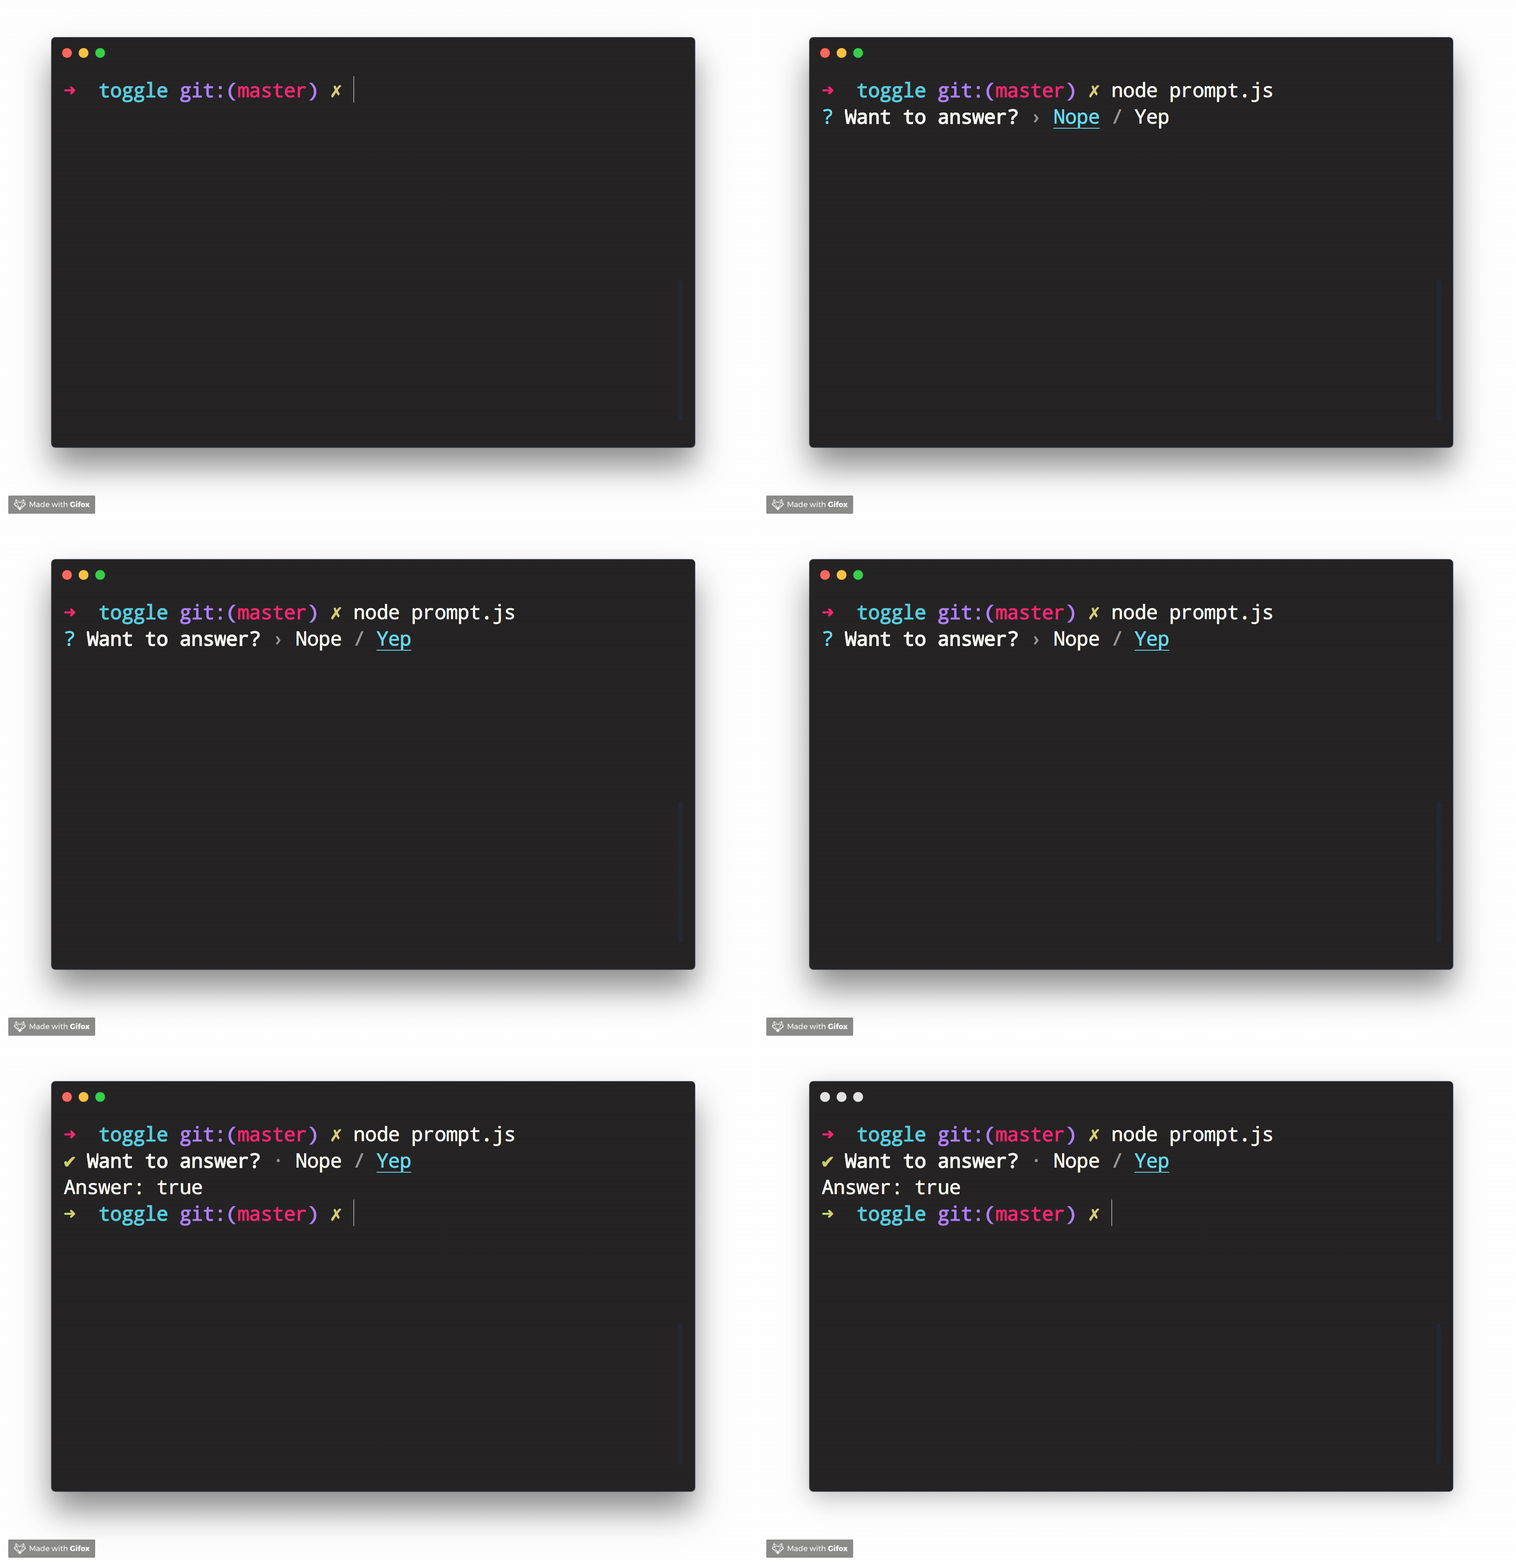
Prompt that allows the user to toggle between two values then returns true or false.
Example Usage
const { Toggle } = require('enquirer');

const prompt = new Toggle({
  message: 'Want to answer?',
  enabled: 'Yep',
  disabled: 'Nope'
});

prompt.run()
  .then(answer => console.log('Answer:', answer))
  .catch(console.error);
Related prompts
↑ back to: Getting Started · Prompts
Prompt Types
There are 5 (soon to be 6!) type classes:
- ArrayPrompt
- AuthPrompt
- BooleanPrompt
- DatePrompt (Coming Soon!)
- NumberPrompt
- StringPrompt
Each type is a low-level class that may be used as a starting point for creating higher level prompts. Continue reading to learn how.
ArrayPrompt
The ArrayPrompt class is used for creating prompts that display a list of choices in the terminal. For example, Enquirer uses this class as the basis for the Select and Survey prompts.
Options
In addition to the options available to all prompts, Array prompts also support the following options.
| Option | Required? | Type | Description |
|---|---|---|---|
autofocus |
no |
string\|number |
The index or name of the choice that should have focus when the prompt loads. Only one choice may have focus at a time. |
stdin |
no |
stream |
The input stream to use for emitting keypress events. Defaults to process.stdin. |
stdout |
no |
stream |
The output stream to use for writing the prompt to the terminal. Defaults to process.stdout. |
Properties
Array prompts have the following instance properties and getters.
| Property name | Type | Description |
|---|---|---|
choices |
array |
Array of choices that have been normalized from choices passed on the prompt options. |
cursor |
number |
Position of the cursor relative to the user input (string). |
enabled |
array |
Returns an array of enabled choices. |
focused |
array |
Returns the currently selected choice in the visible list of choices. This is similar to the concept of focus in HTML and CSS. Focused choices are always visible (on-screen). When a list of choices is longer than the list of visible choices, and an off-screen choice is focused, the list will scroll to the focused choice and re-render. |
focused |
Gets the currently selected choice. Equivalent to prompt.choices[prompt.index]. |
|
index |
number |
Position of the pointer in the visible list (array) of choices. |
limit |
number |
The number of choices to display on-screen. |
selected |
array |
Either a list of enabled choices (when options.multiple is true) or the currently focused choice. |
visible |
string |
Methods
| Method | Description |
|---|---|
pointer() |
Returns the visual symbol to use to identify the choice that currently has focus. The ❯ symbol is often used for this. The pointer is not always visible, as with the autocomplete prompt. |
indicator() |
Returns the visual symbol that indicates whether or not a choice is checked/enabled. |
focus() |
Sets focus on a choice, if it can be focused. |
Choices
Array prompts support the choices option, which is the array of choices users will be able to select from when rendered in the terminal.
Type: string|object
Example
const { prompt } = require('enquirer');

const questions = [{
  type: 'select',
  name: 'color',
  message: 'Favorite color?',
  initial: 1,
  choices: [
    { name: 'red',   message: 'Red',   value: '#ff0000' }, //<= choice object
    { name: 'green', message: 'Green', value: '#00ff00' }, //<= choice object
    { name: 'blue',  message: 'Blue',  value: '#0000ff' }  //<= choice object
  ]
}];

let answers = await prompt(questions);
console.log('Answer:', answers.color);
Defining choices
Whether defined as a string or object, choices are normalized to the following interface:
{
  name: string;
  message: string | undefined;
  value: string | undefined;
  hint: string | undefined;
  disabled: boolean | string | undefined;
}
Example
const question = {
  name: 'fruit',
  message: 'Favorite fruit?',
  choices: ['Apple', 'Orange', 'Raspberry']
};
Normalizes to the following when the prompt is run:
const question = {
  name: 'fruit',
  message: 'Favorite fruit?',
  choices: [
    { name: 'Apple', message: 'Apple', value: 'Apple' },
    { name: 'Orange', message: 'Orange', value: 'Orange' },
    { name: 'Raspberry', message: 'Raspberry', value: 'Raspberry' }
  ]
};
Choice properties
The following properties are supported on choice objects.
| Option | Type | Description |
|---|---|---|
name |
string |
The unique key to identify a choice |
message |
string |
The message to display in the terminal. name is used when this is undefined. |
value |
string |
Value to associate with the choice. Useful for creating key-value pairs from user choices. name is used when this is undefined. |
choices |
array |
Array of "child" choices. |
hint |
string |
Help message to display next to a choice. |
role |
string |
Determines how the choice will be displayed. Currently the only role supported is separator. Additional roles may be added in the future (like heading, etc). Please create a [feature request] |
enabled |
boolean |
Enabled a choice by default. This is only supported when options.multiple is true or on prompts that support multiple choices, like MultiSelect. |
disabled |
boolean\|string |
Disable a choice so that it cannot be selected. This value may either be true, false, or a message to display. |
indicator |
string\|function |
Custom indicator to render for a choice (like a check or radio button). |
Related prompts
AuthPrompt
The AuthPrompt is used to create prompts to log in user using any authentication method. For example, Enquirer uses this class as the basis for the BasicAuth Prompt. You can also find prompt examples in examples/auth/ folder that utilizes AuthPrompt to create OAuth based authentication prompt or a prompt that authenticates using time-based OTP, among others.
AuthPrompt has a factory function that creates an instance of AuthPrompt class and it expects an authenticate function, as an argument, which overrides the authenticate function of the AuthPrompt class.
Methods
| Method | Description |
|---|---|
authenticate() |
Contain all the authentication logic. This function should be overridden to implement custom authentication logic. The default authenticate function throws an error if no other function is provided. |
Choices
Auth prompt supports the choices option, which is the similar to the choices used in Form Prompt.
Example
const { AuthPrompt } = require('enquirer');

function authenticate(value, state) {
  if (value.username === this.options.username && value.password === this.options.password) {
    return true;
  }
  return false;
}

const CustomAuthPrompt = AuthPrompt.create(authenticate);

const prompt = new CustomAuthPrompt({
  name: 'password',
  message: 'Please enter your password',
  username: 'rajat-sr',
  password: '1234567',
  choices: [
    { name: 'username', message: 'username' },
    { name: 'password', message: 'password' }
  ]
});

prompt
  .run()
  .then(answer => console.log('Authenticated?', answer))
  .catch(console.error);
Related prompts
BooleanPrompt
The BooleanPrompt class is used for creating prompts that display and return a boolean value.
const { BooleanPrompt } = require('enquirer');

const  prompt = new  BooleanPrompt({
  header:  '========================',
  message:  'Do you love enquirer?',
  footer:  '========================',
});

prompt.run()
  .then(answer  =>  console.log('Selected:', answer))
  .catch(console.error);
Returns: boolean
NumberPrompt
The NumberPrompt class is used for creating prompts that display and return a numerical value.
const { NumberPrompt } = require('enquirer');

const  prompt = new  NumberPrompt({
  header:  '************************',
  message:  'Input the Numbers:',
  footer:  '************************',
});

prompt.run()
  .then(answer  =>  console.log('Numbers are:', answer))
  .catch(console.error);
Returns: string|number (number, or number formatted as a string)
StringPrompt
The StringPrompt class is used for creating prompts that display and return a string value.
const { StringPrompt } = require('enquirer');

const prompt = new StringPrompt({
  header: '************************',
  message: 'Input the String:',
  footer: '************************'
});

prompt.run()
  .then(answer => console.log('String is:', answer))
  .catch(console.error);
Returns: string
❯ Custom prompts
With Enquirer 2.0, custom prompts are easier than ever to create and use.
How do I create a custom prompt?
Custom prompts are created by extending either:
const { Prompt } = require('enquirer');

class HaiKarate extends Prompt {
  constructor(options = {}) {
    super(options);
    this.value = options.initial || 0;
    this.cursorHide();
  }
  up() {
    this.value++;
    this.render();
  }
  down() {
    this.value--;
    this.render();
  }
  render() {
    this.clear(); // clear previously rendered prompt from the terminal
    this.write(`${this.state.message}: ${this.value}`);
  }
}

// Use the prompt by creating an instance of your custom prompt class.
const prompt = new HaiKarate({
  message: 'How many sprays do you want?',
  initial: 10
});

prompt.run()
  .then(answer => console.log('Sprays:', answer))
  .catch(console.error);
If you want to be able to specify your prompt by type so that it may be used alongside other prompts, you will need to first create an instance of Enquirer.
const Enquirer = require('enquirer');
const enquirer = new Enquirer();
Then use the .register() method to add your custom prompt.
enquirer.register('haikarate', HaiKarate);
Now you can do the following when defining "questions".
let spritzer = require('cologne-drone');
let answers = await enquirer.prompt([
  {
    type: 'haikarate',
    name: 'cologne',
    message: 'How many sprays do you need?',
    initial: 10,
    async onSubmit(name, value) {
      await spritzer.activate(value); //<= activate drone
      return value;
    }
  }
]);
❯ Key Bindings
All prompts
These key combinations may be used with all prompts.
| command | description |
|---|---|
| ctrl + c | Cancel the prompt. |
| ctrl + g | Reset the prompt to its initial state. |
Move cursor
These combinations may be used on prompts that support user input (eg. input prompt, password prompt, and invisible prompt).
| command | description |
|---|---|
| left | Move the cursor back one character. |
| right | Move the cursor forward one character. |
| ctrl + a | Move cursor to the start of the line |
| ctrl + e | Move cursor to the end of the line |
| ctrl + b | Move cursor back one character |
| ctrl + f | Move cursor forward one character |
| ctrl + x | Toggle between first and cursor position |
Edit Input
These key combinations may be used on prompts that support user input (eg. input prompt, password prompt, and invisible prompt).
| command | description |
|---|---|
| ctrl + a | Move cursor to the start of the line |
| ctrl + e | Move cursor to the end of the line |
| ctrl + b | Move cursor back one character |
| ctrl + f | Move cursor forward one character |
| ctrl + x | Toggle between first and cursor position |
| command (Mac) | command (Windows) | description |
|---|---|---|
| delete | backspace | Delete one character to the left. |
| fn + delete | delete | Delete one character to the right. |
| option + up | alt + up | Scroll to the previous item in history (Input prompt only, when history is enabled). |
| option + down | alt + down | Scroll to the next item in history (Input prompt only, when history is enabled). |
Select choices
These key combinations may be used on prompts that support multiple choices, such as the multiselect prompt, or the select prompt when the multiple options is true.
| command | description |
|---|---|
| space | Toggle the currently selected choice when options.multiple is true. |
| number | Move the pointer to the choice at the given index. Also toggles the selected choice when options.multiple is true. |
| a | Toggle all choices to be enabled or disabled. |
| i | Invert the current selection of choices. |
| g | Toggle the current choice group. |
Hide/show choices
| command | description |
|---|---|
| fn + up | Decrease the number of visible choices by one. |
| fn + down | Increase the number of visible choices by one. |
Move/lock Pointer
| command | description |
|---|---|
| number | Move the pointer to the choice at the given index. Also toggles the selected choice when options.multiple is true. |
| up | Move the pointer up. |
| down | Move the pointer down. |
| ctrl + a | Move the pointer to the first visible choice. |
| ctrl + e | Move the pointer to the last visible choice. |
| shift + up | Scroll up one choice without changing pointer position (locks the pointer while scrolling). |
| shift + down | Scroll down one choice without changing pointer position (locks the pointer while scrolling). |
| command (Mac) | command (Windows) | description |
|---|---|---|
| fn + left | home | Move the pointer to the first choice in the choices array. |
| fn + right | end | Move the pointer to the last choice in the choices array. |
❯ Release History
Please see CHANGELOG.md.
❯ Performance
System specs
MacBook Pro, Intel Core i7, 2.5 GHz, 16 GB.
Load time
Time it takes for the module to load the first time (average of 3 runs):
enquirer: 4.013ms
inquirer: 286.717ms
❯ About
Contributing
Pull requests and stars are always welcome. For bugs and feature requests, please create an issue.
Todo
We're currently working on documentation for the following items. Please star and watch the repository for updates!
Running Tests
Running and reviewing unit tests is a great way to get familiarized with a library and its API. You can install dependencies and run tests with the following command:
$ npm install && npm test
$ yarn && yarn test
Building docs
(This project's readme.md is generated by verb, please don't edit the readme directly. Any changes to the readme must be made in the .verb.md readme template.)
To generate the readme, run the following command:
$ npm install -g verbose/verb#dev verb-generate-readme && verb
Contributors
| Commits | Contributor |
|---|---|
| 283 | jonschlinkert |
| 82 | doowb |
| 32 | rajat-sr |
| 20 | 318097 |
| 15 | g-plane |
| 12 | pixelass |
| 5 | adityavyas611 |
| 5 | satotake |
| 3 | tunnckoCore |
| 3 | Ovyerus |
| 3 | sw-yx |
| 2 | DanielRuf |
| 2 | GabeL7r |
| 1 | AlCalzone |
| 1 | hipstersmoothie |
| 1 | danieldelcore |
| 1 | ImgBotApp |
| 1 | jsonkao |
| 1 | knpwrs |
| 1 | yeskunall |
| 1 | mischah |
| 1 | renarsvilnis |
| 1 | sbugert |
| 1 | stephencweiss |
| 1 | skellock |
| 1 | whxaxes |
Author
Jon Schlinkert
Credit
Thanks to derhuerst, creator of prompt libraries such as prompt-skeleton, which influenced some of the concepts we used in our prompts.
License
Copyright © 2018-present, Jon Schlinkert. Released under the MIT License.


